
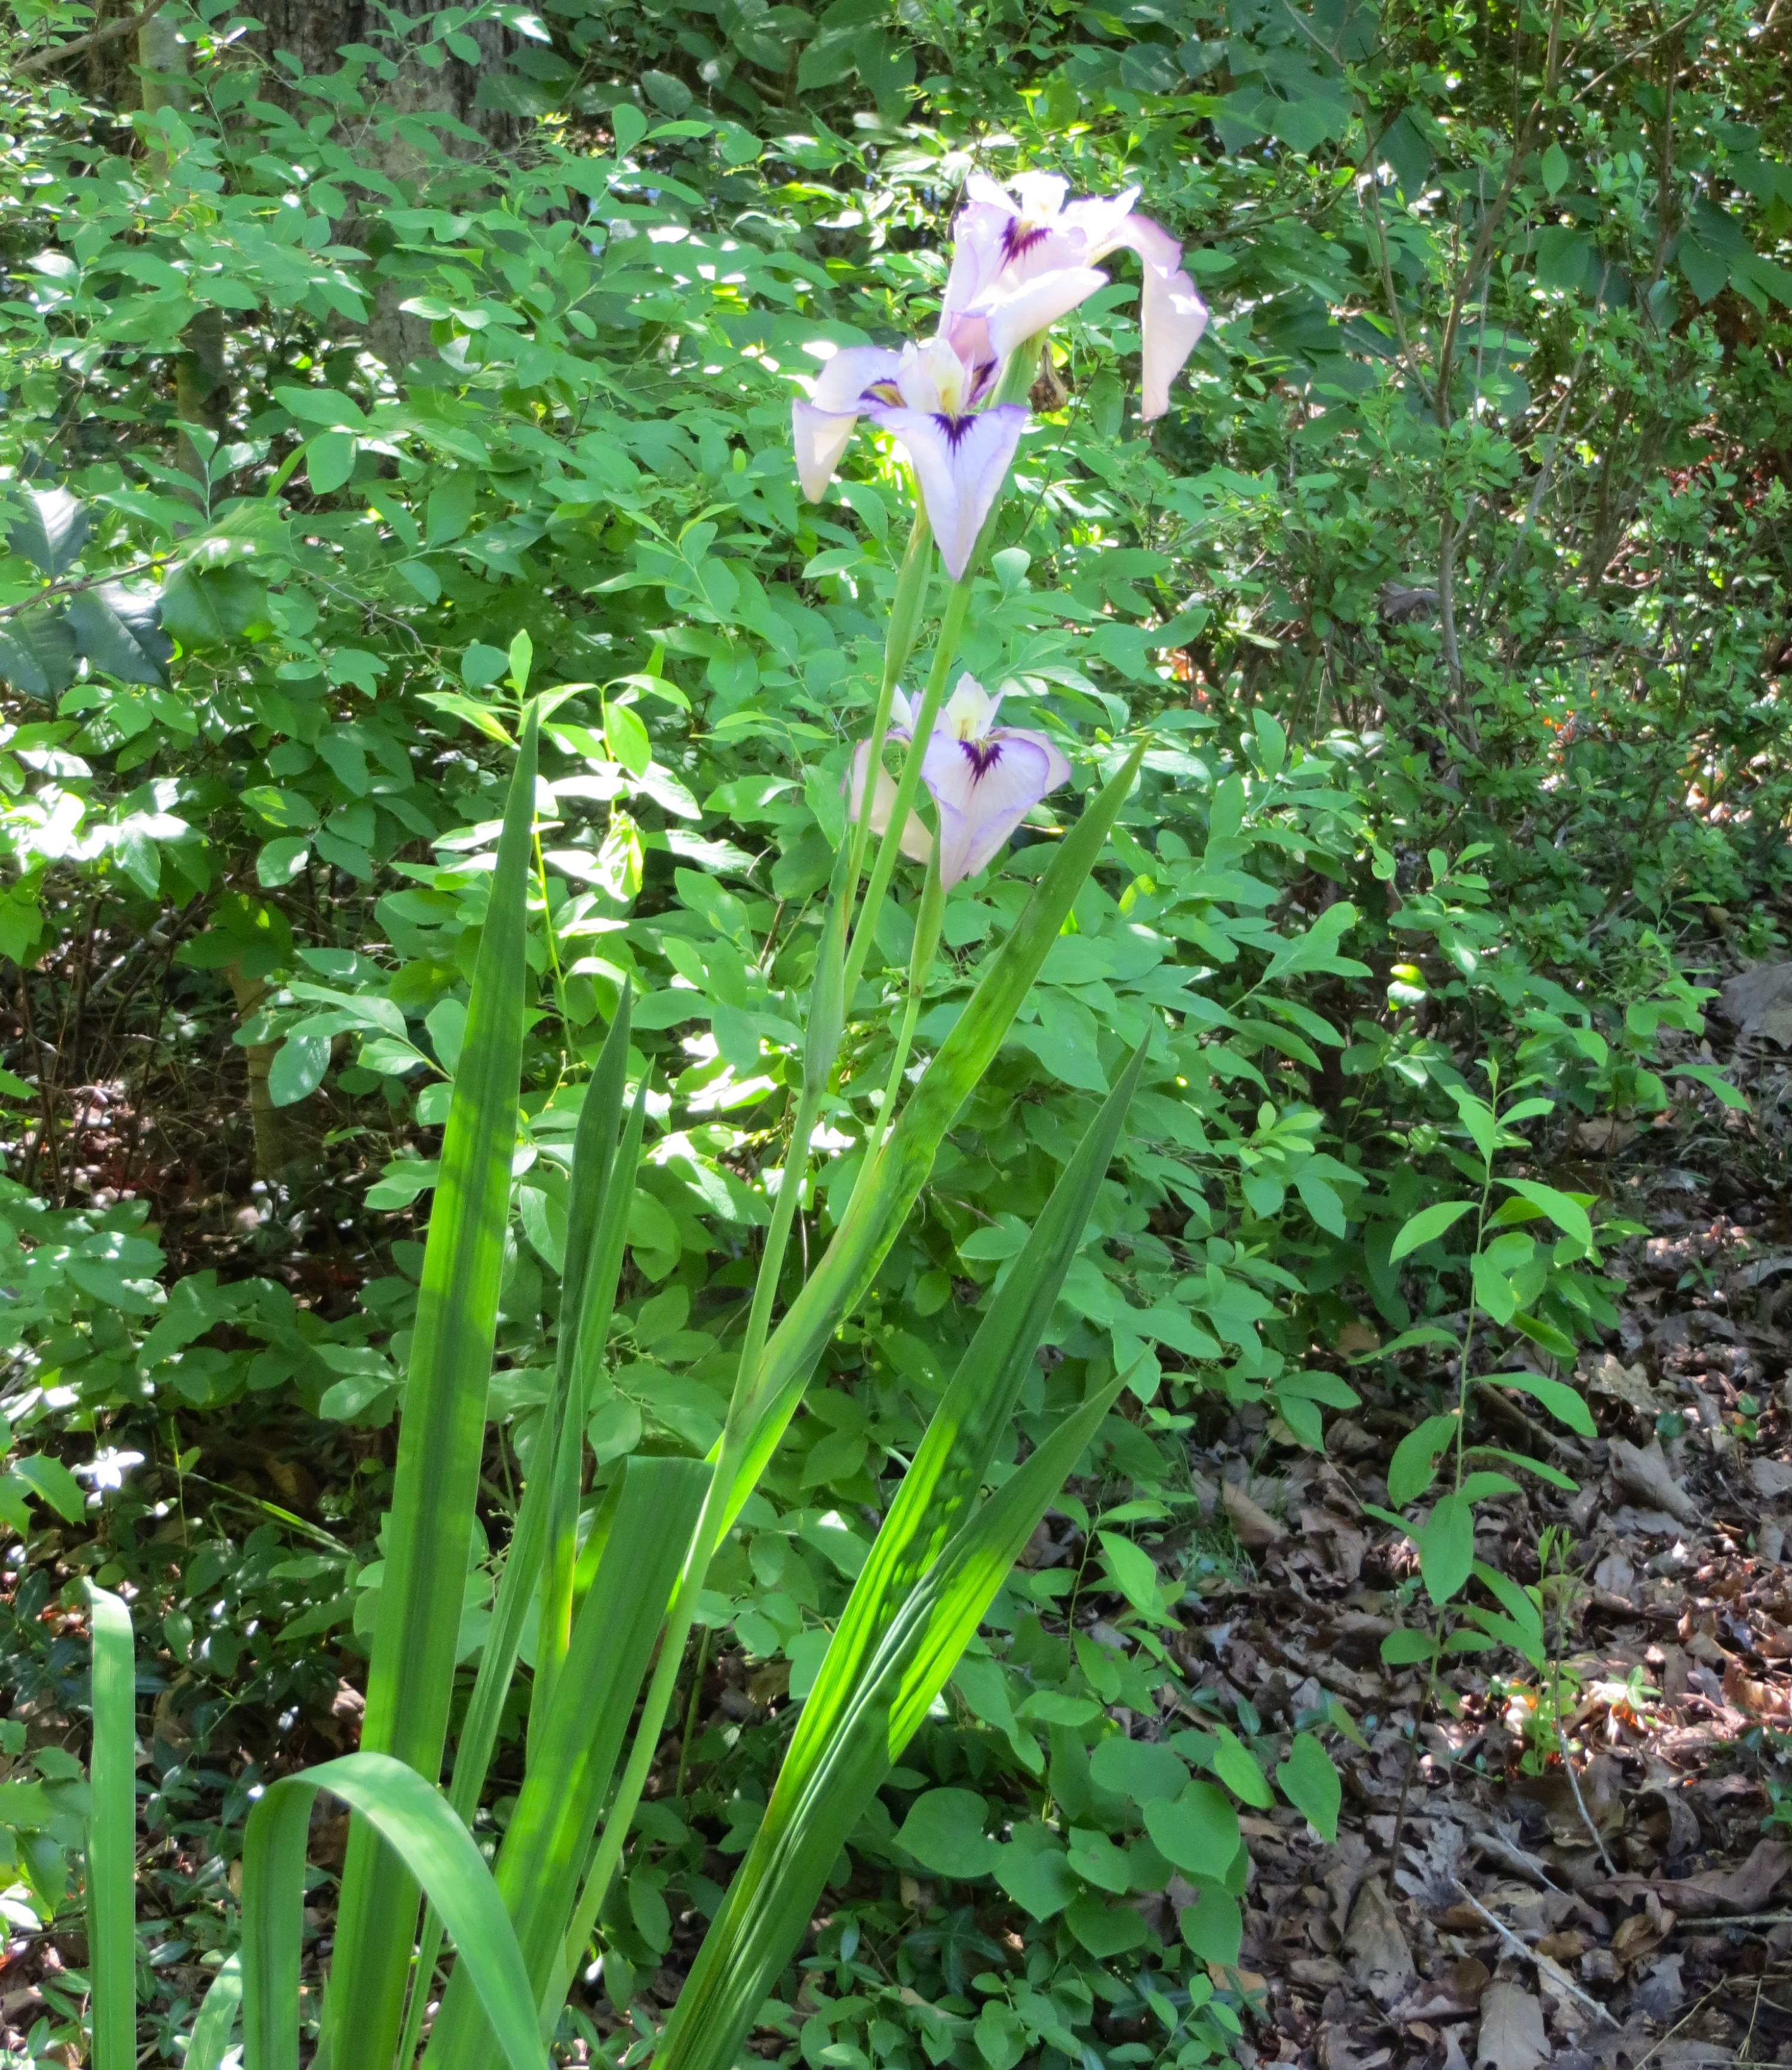
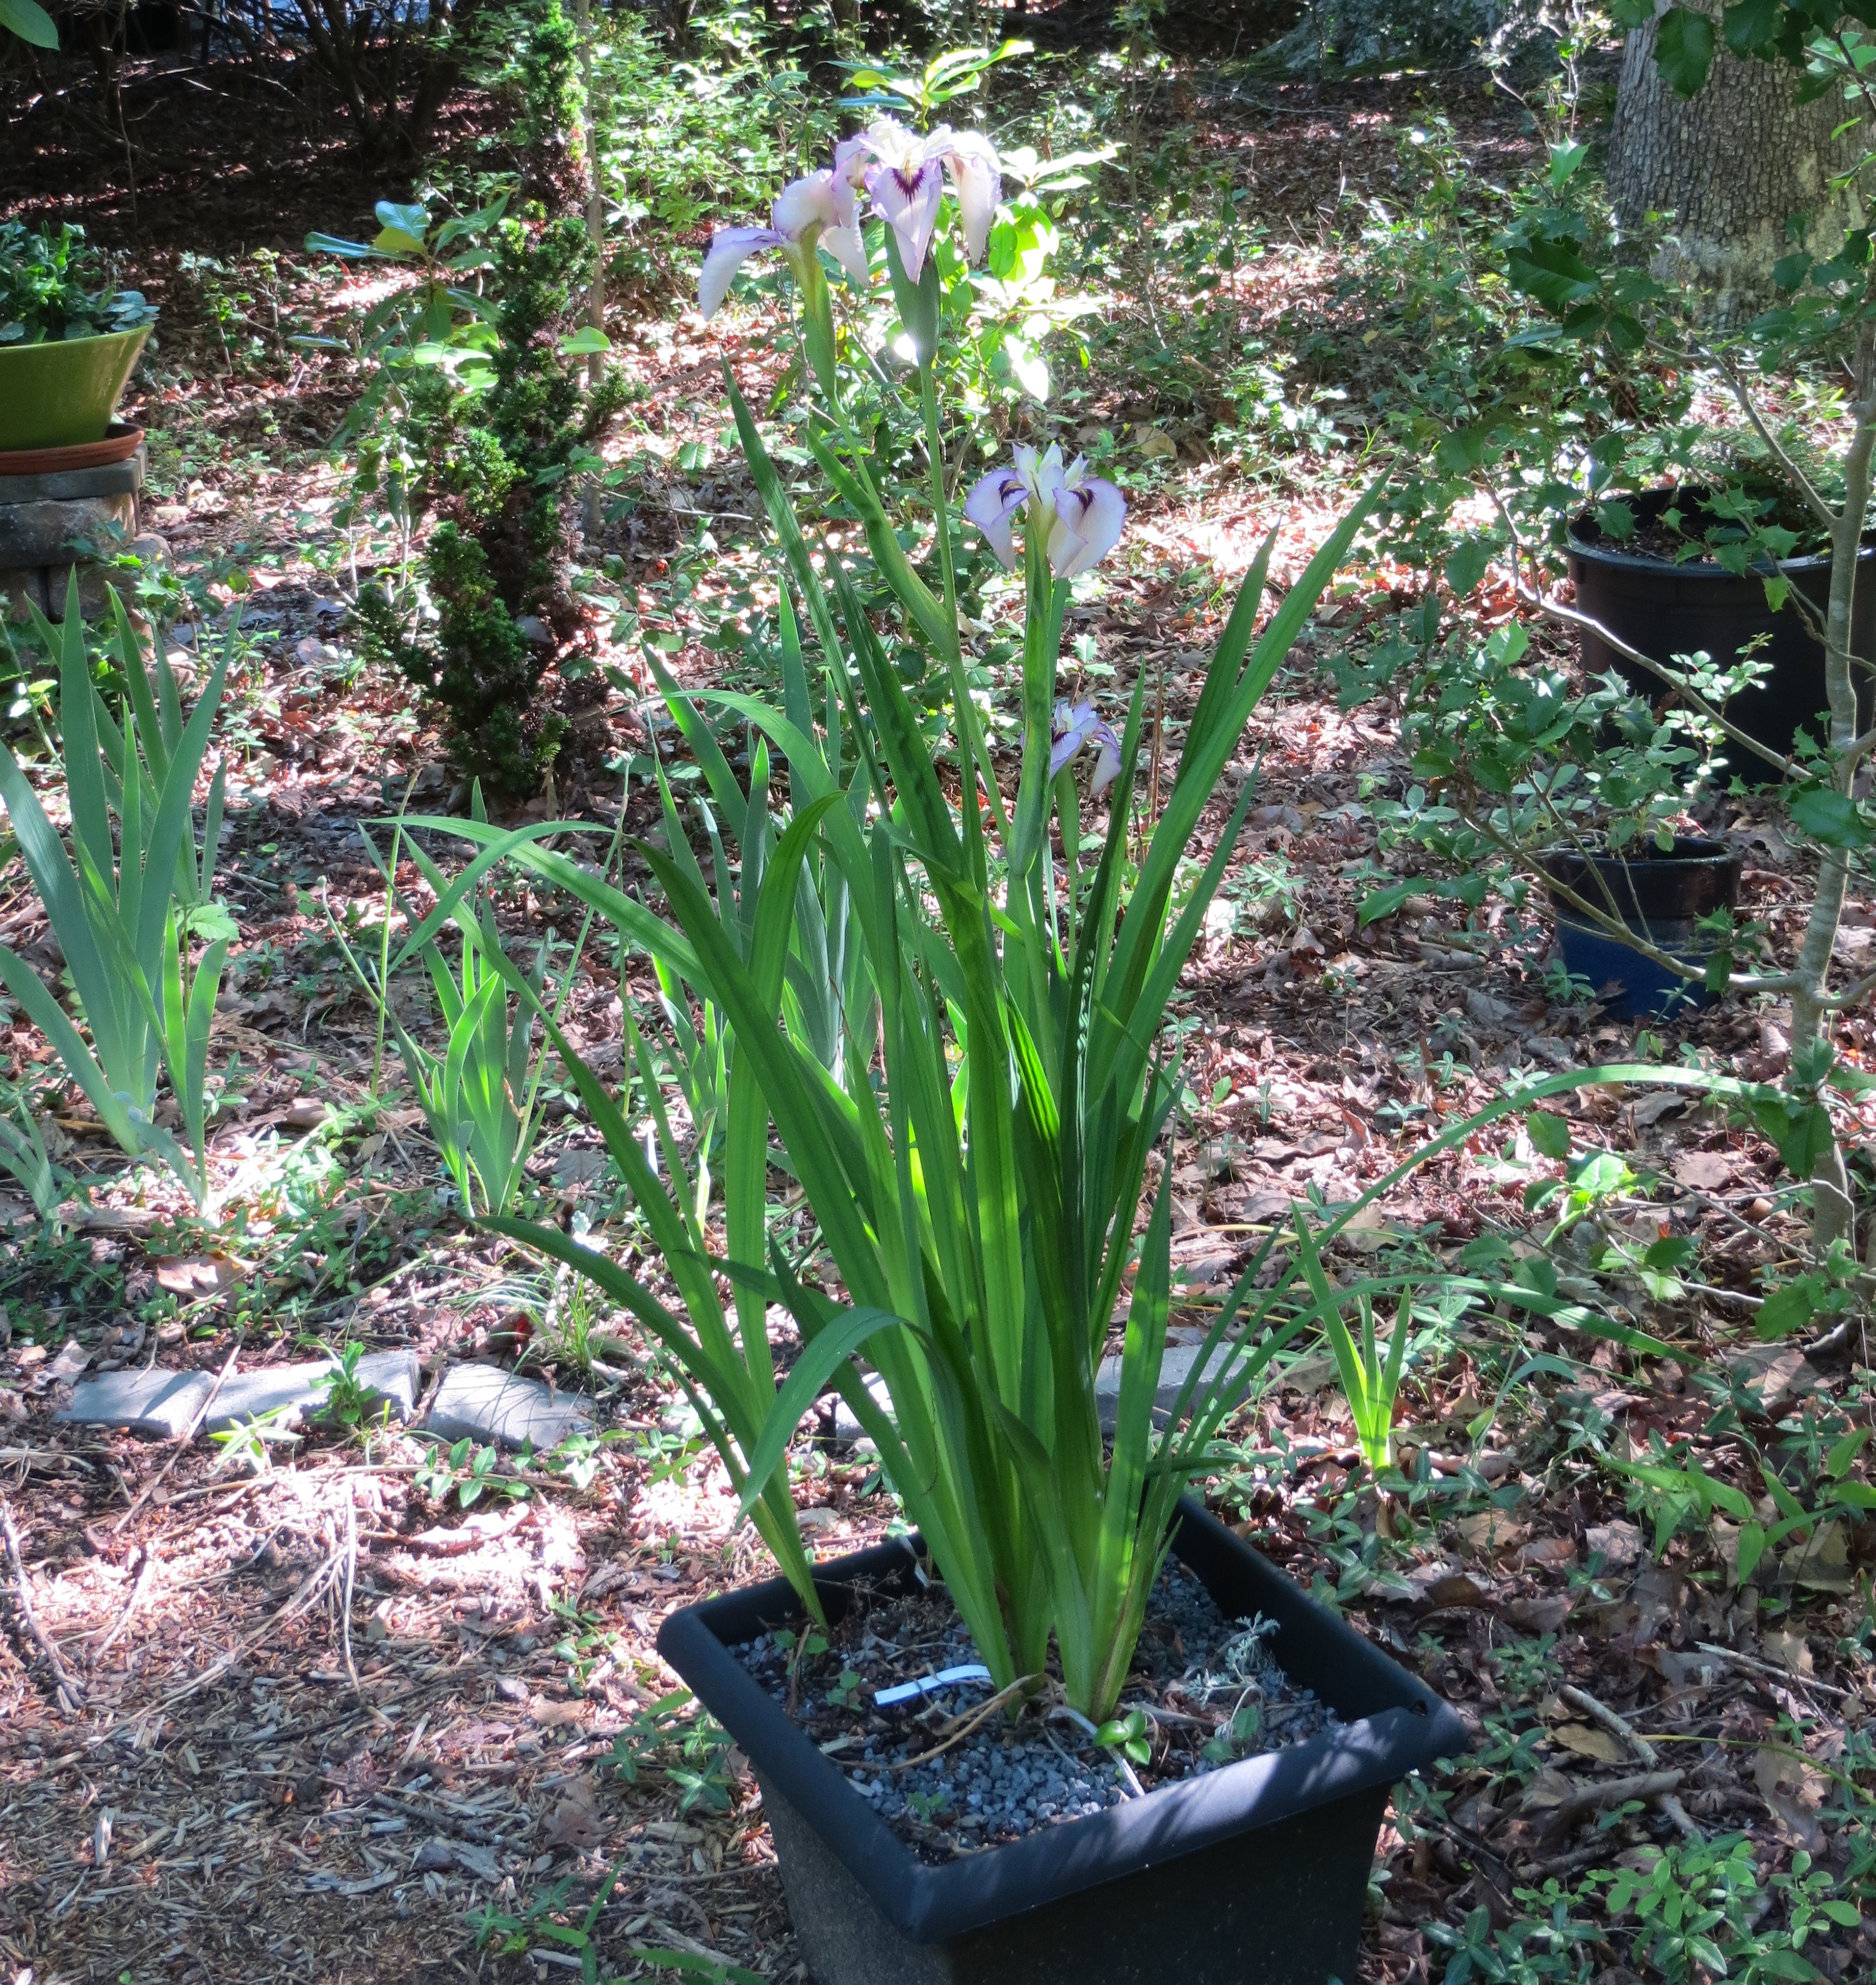
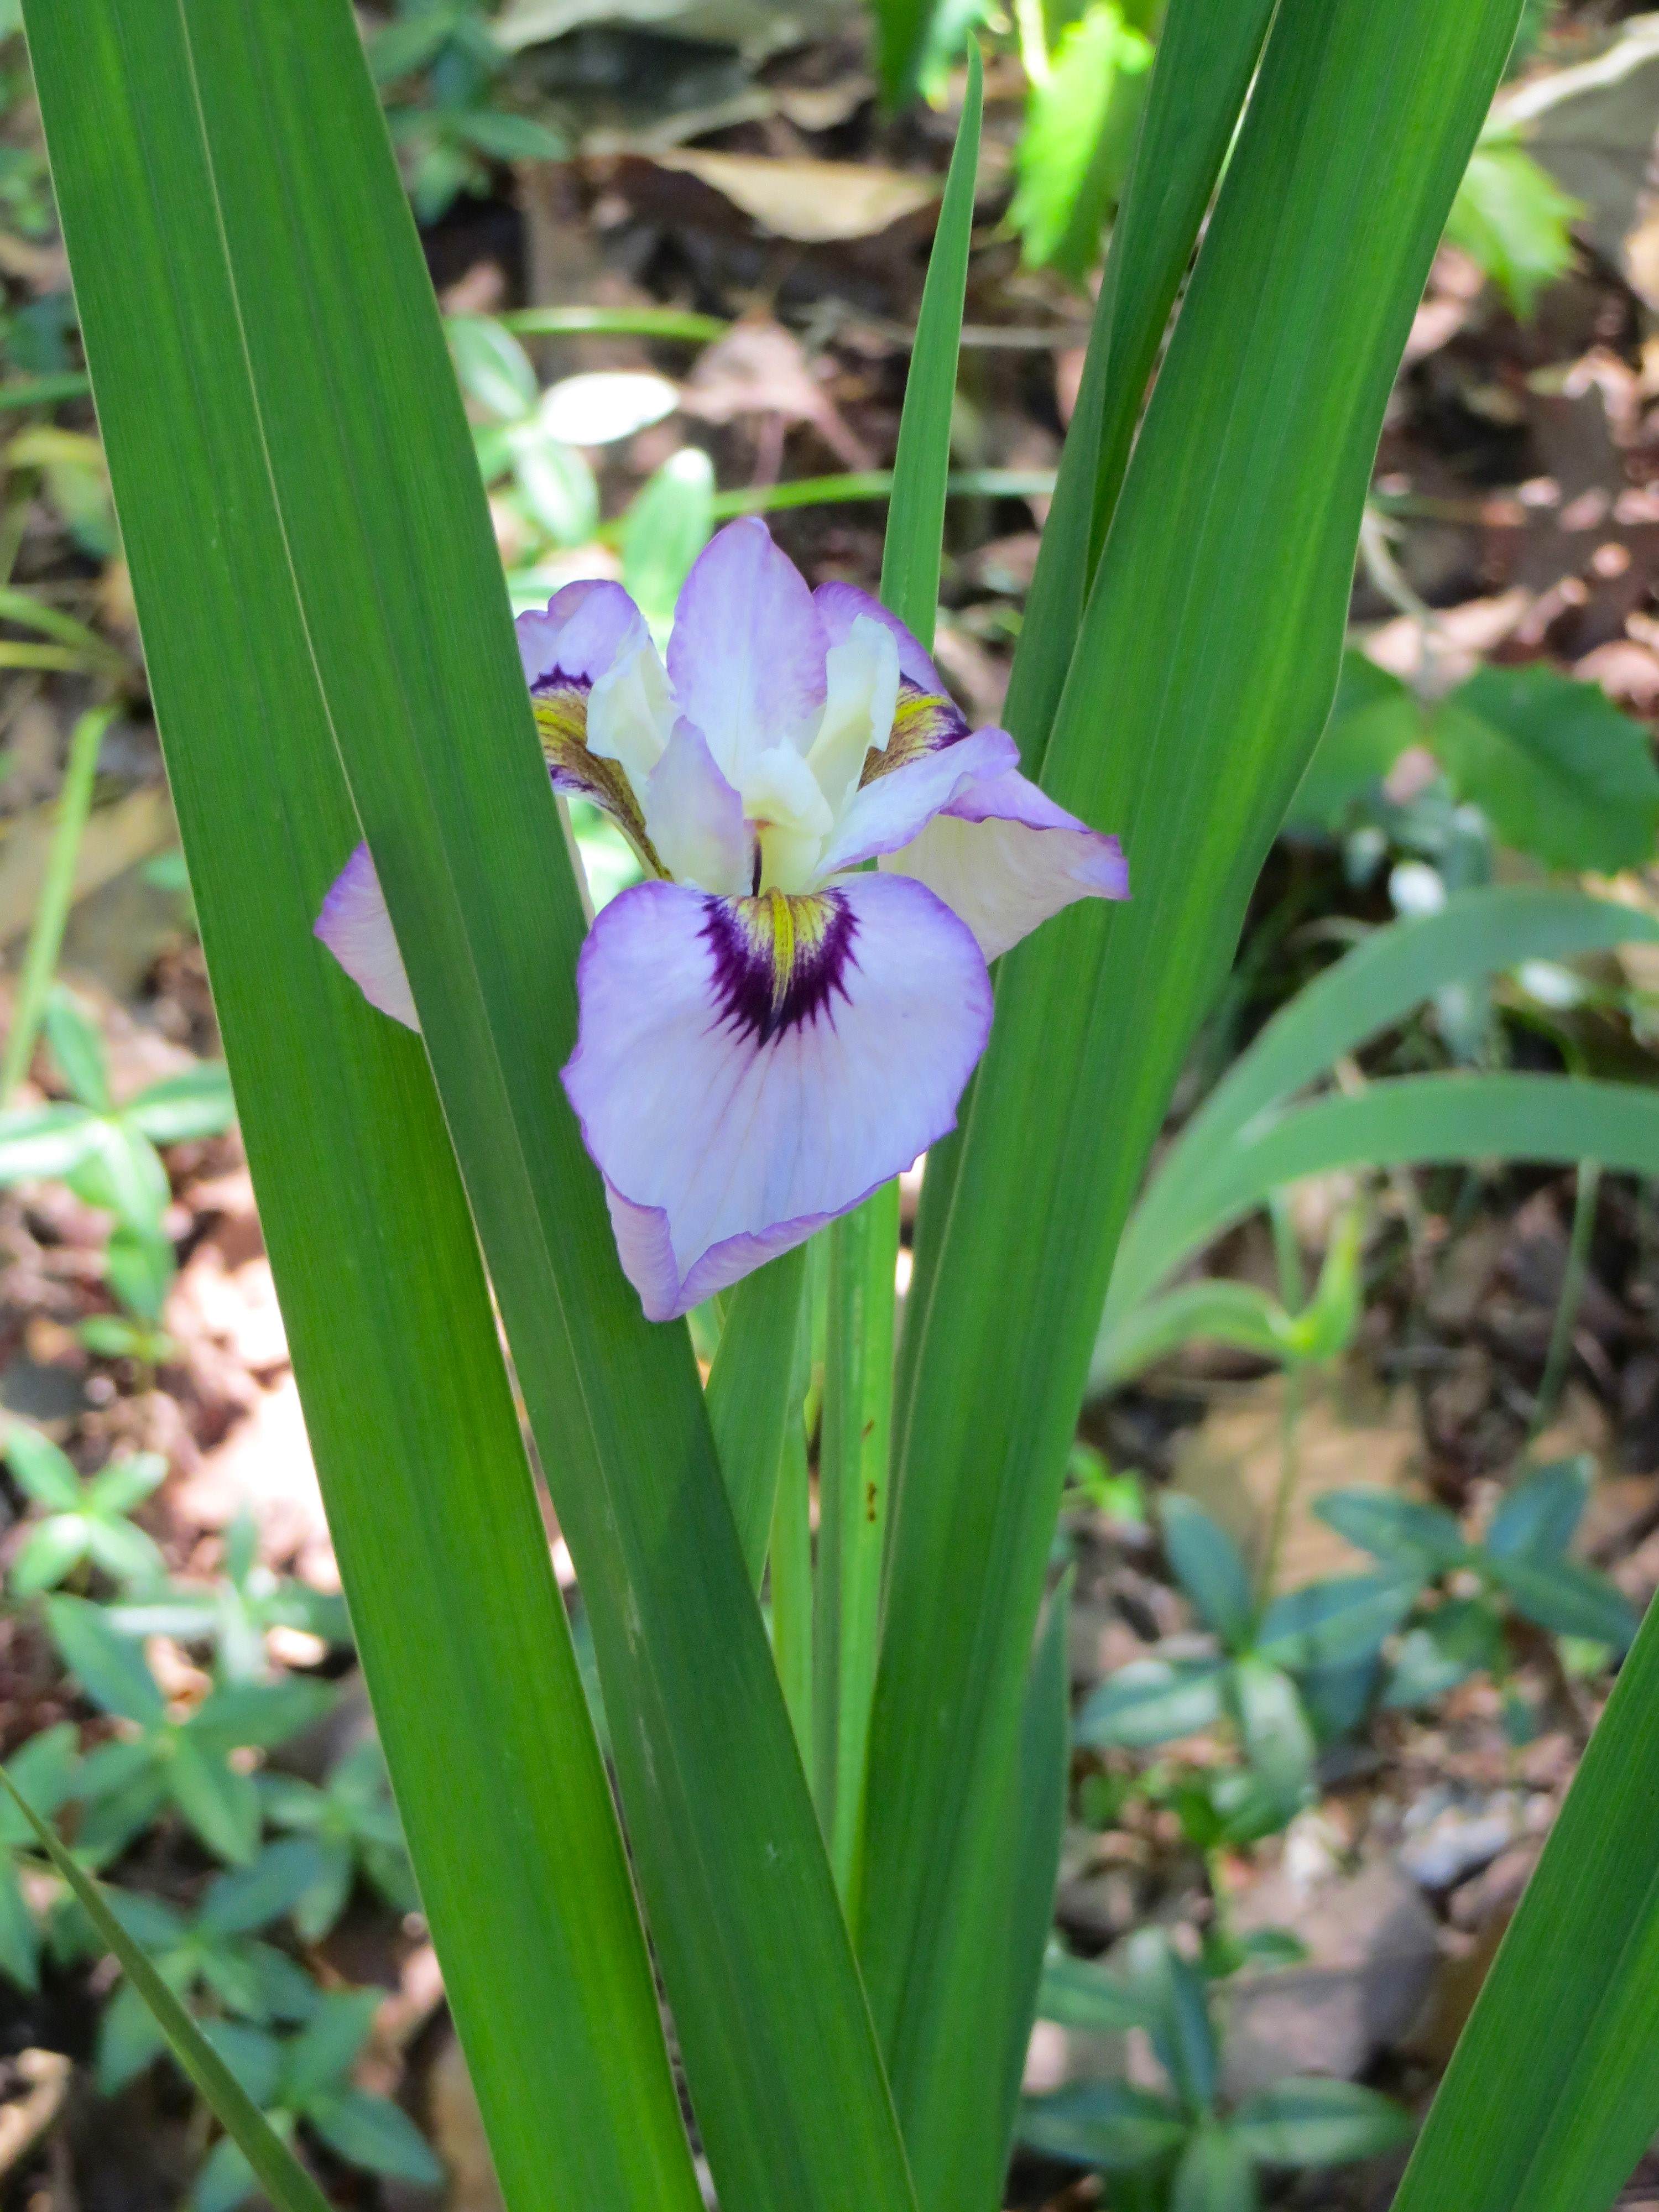
Iris pseudata, a hybrid between European yellow flag Iris pseudacorus and Japanese I. ensata, is a beautiful, sterile, late blooming Iris that thrives in wet soils and blooms in partial shade. The markings and colors of its falls are exquisite. I ordered quite a few several years back, expecting them to thrive here. Those planted in containers are blooming this spring, while those planted in the ground are not, for various reasons. One clump is in too much shade now that trees around it have filled in. Others simply ‘disappeared.’ Voles? Weather?
Flowers, however lovely, prove ephemeral. I deadheaded the last of our peonies this week, their blossoms’ longevity somewhat truncated by our recent downpours and wind. We certainly enjoyed them while they bloomed, even if our supports weren’t quite tall enough to prevent quite a few ‘downward dog’ poses for some of the largest of the flowers. Those ended up indoors, and alas they, too, are now but a memory and a photograph.
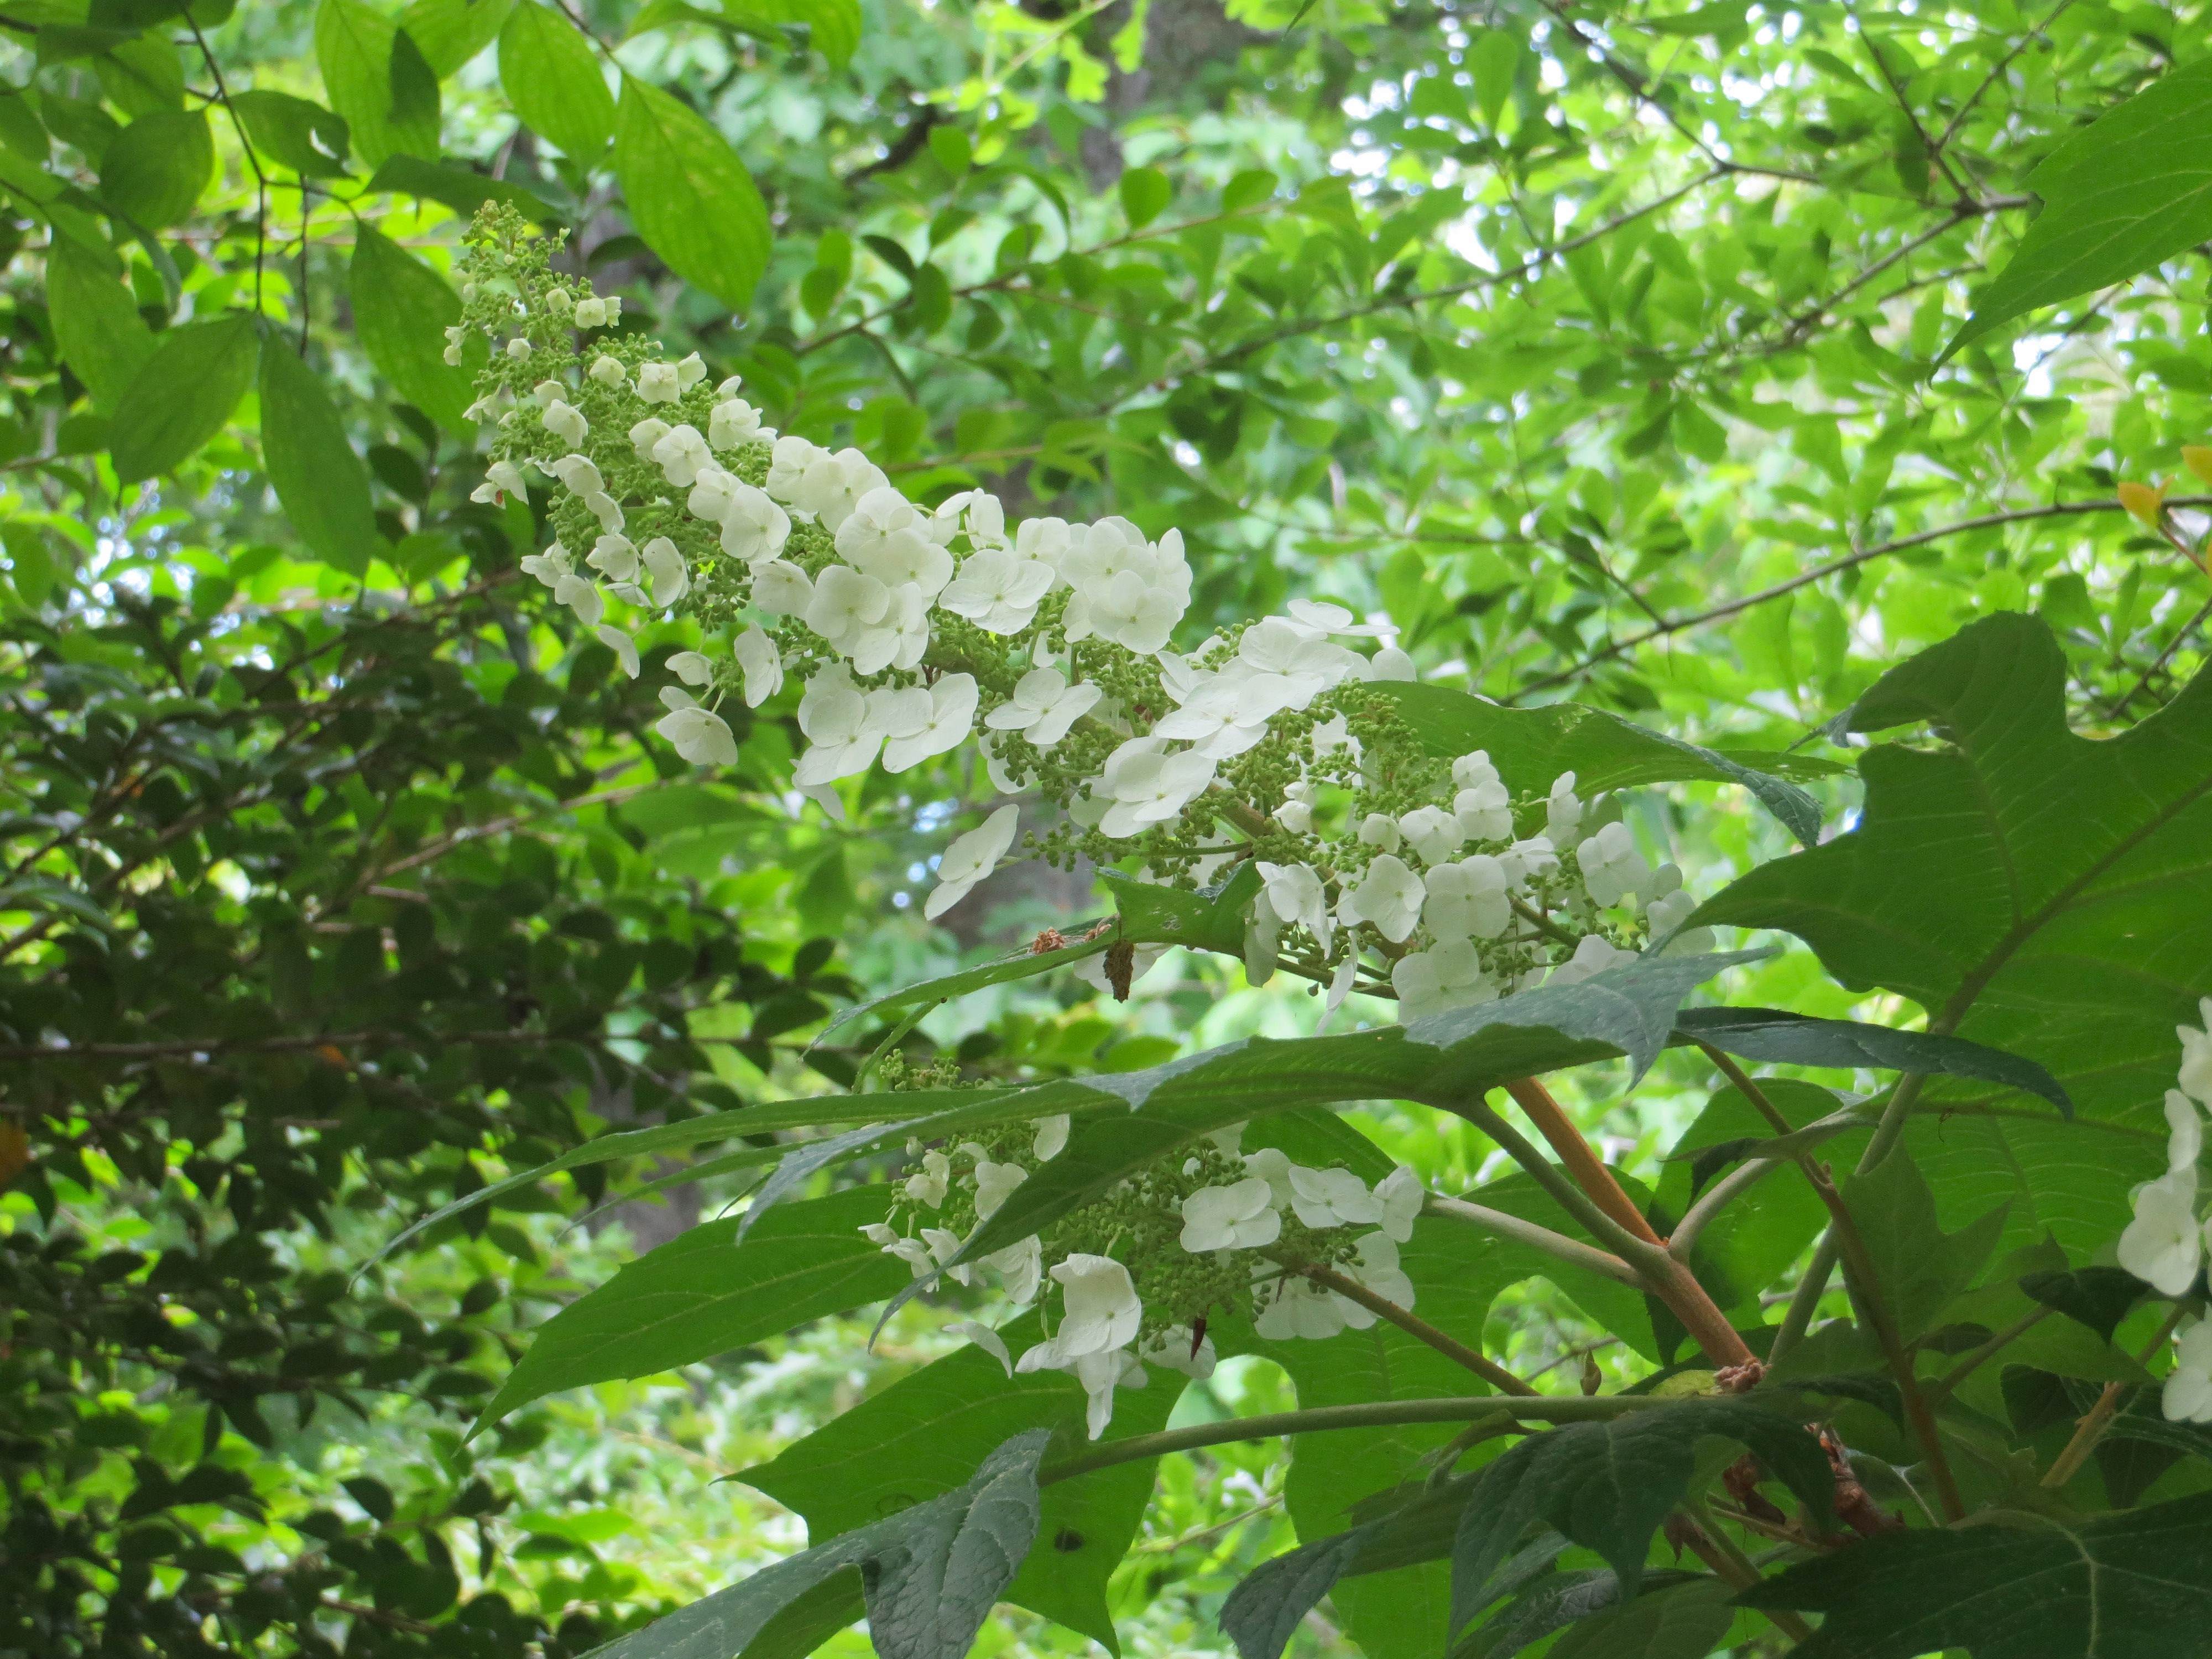
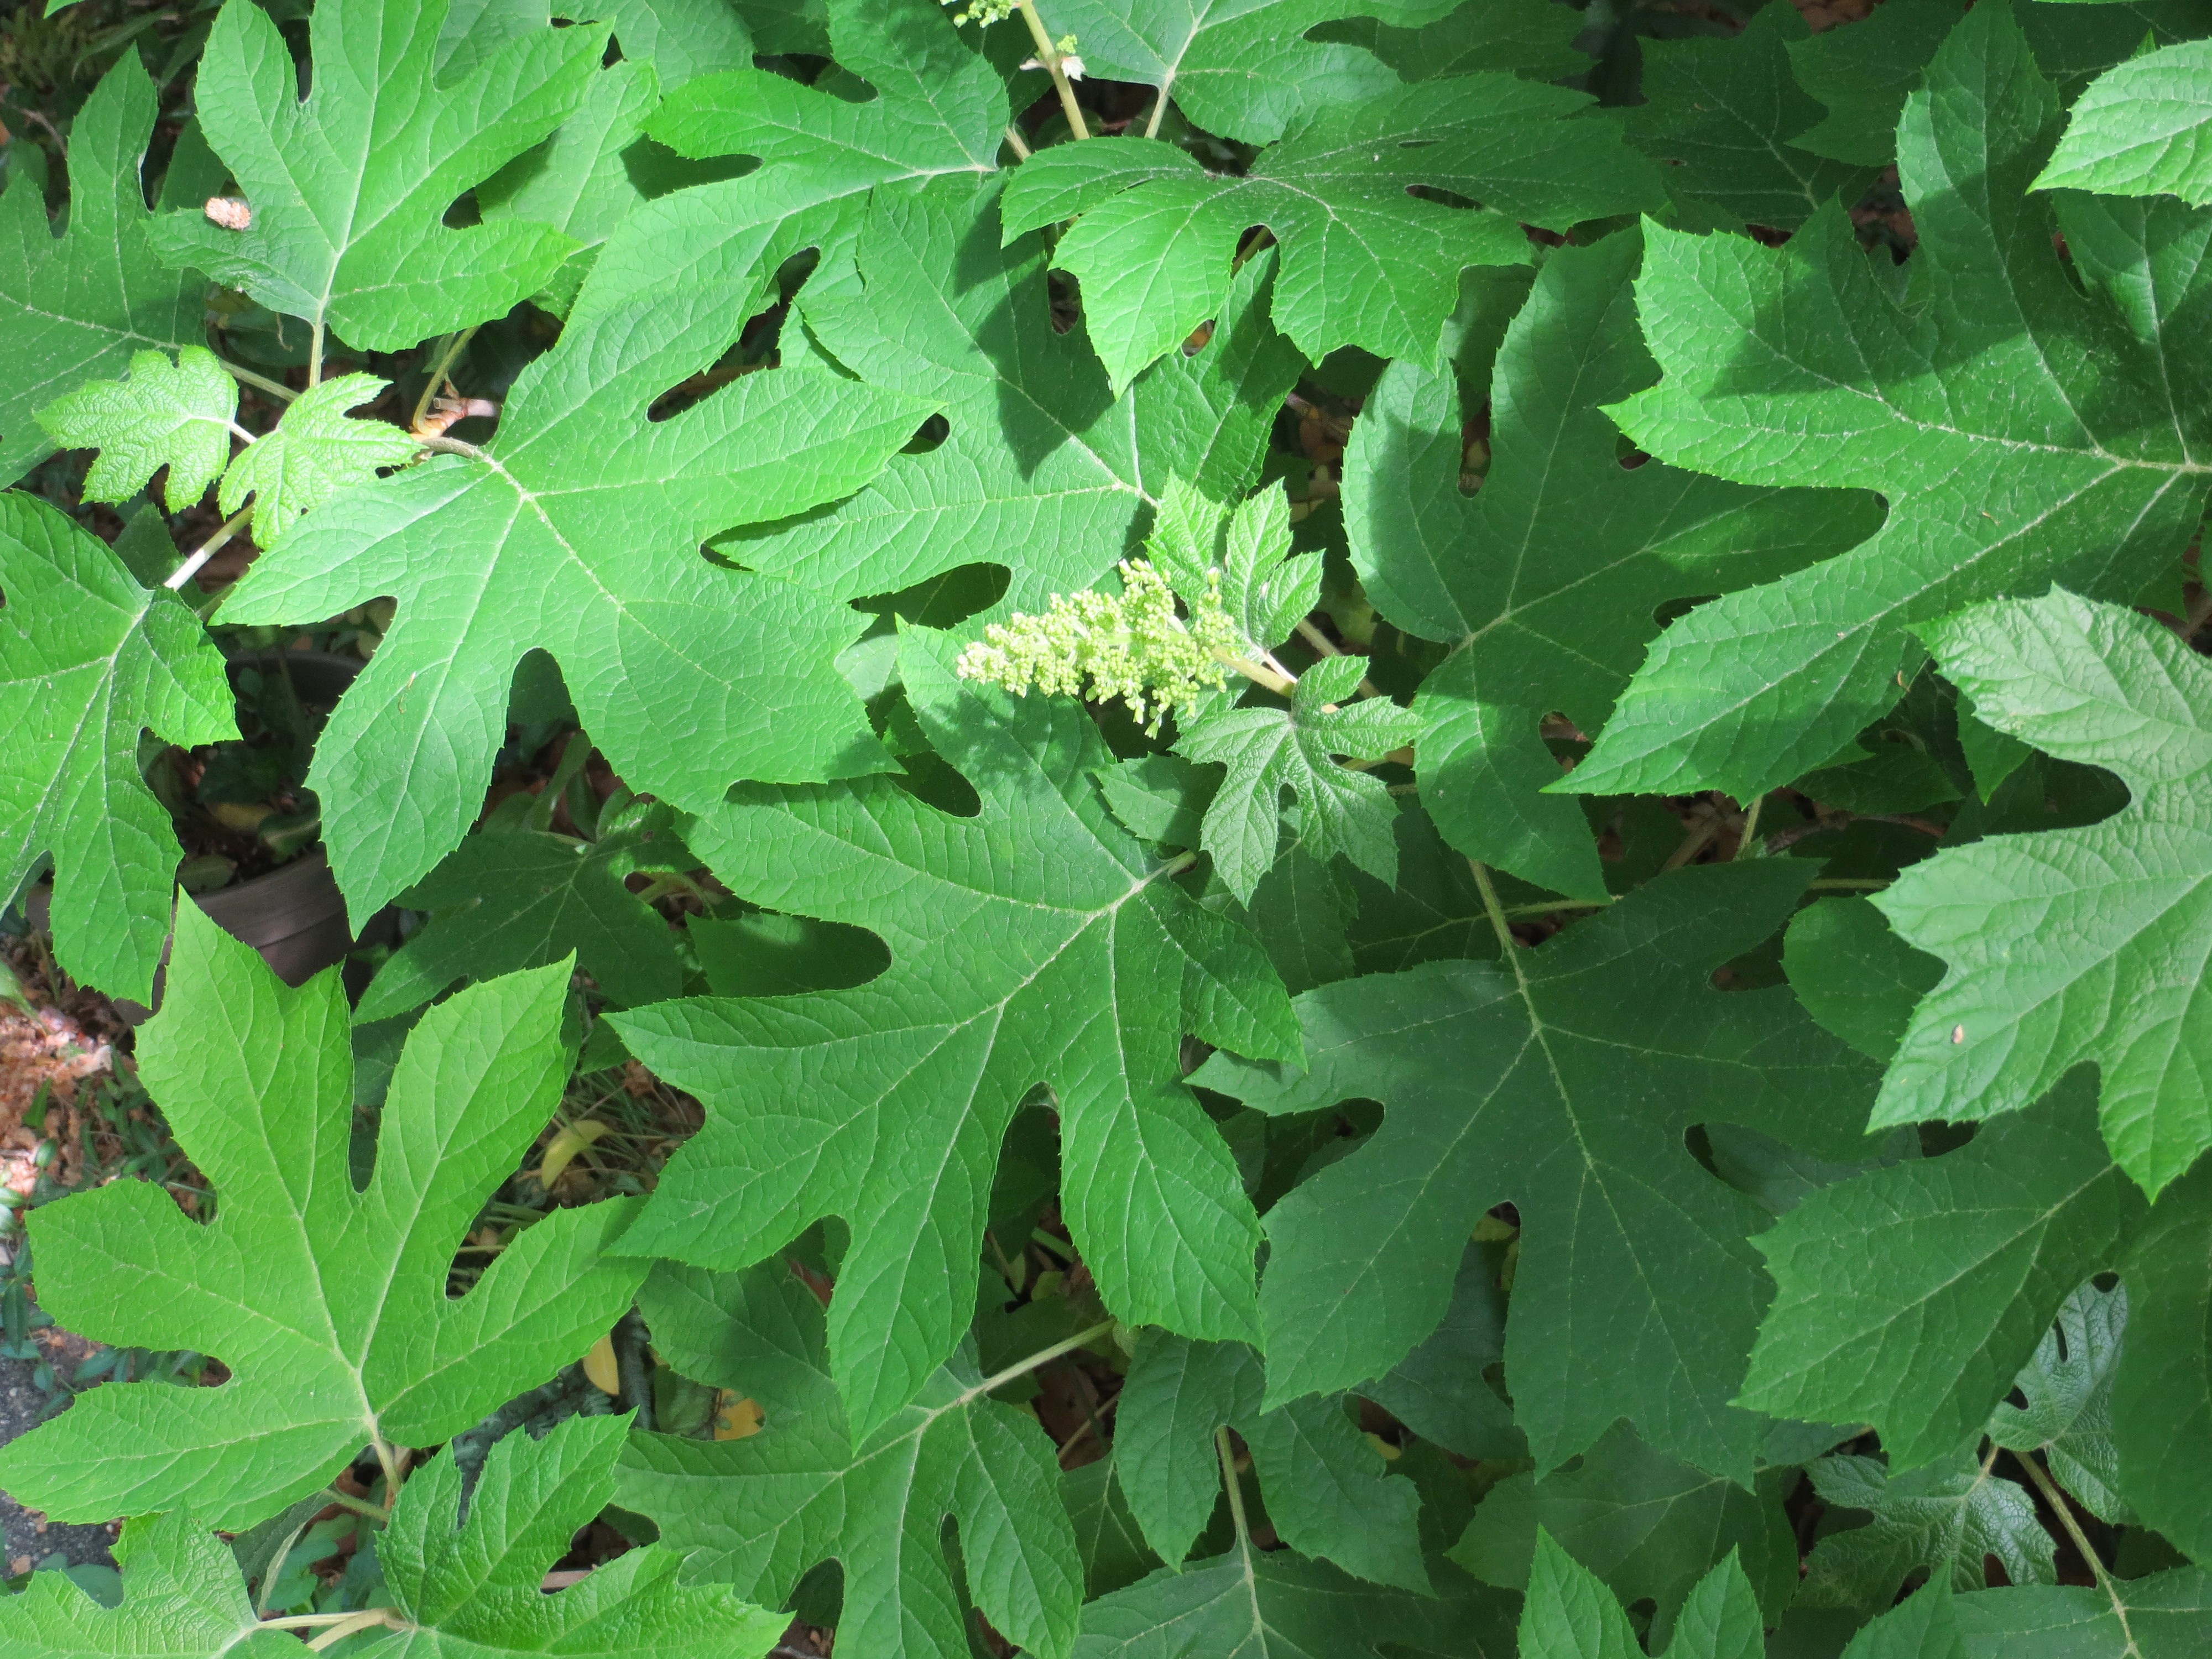
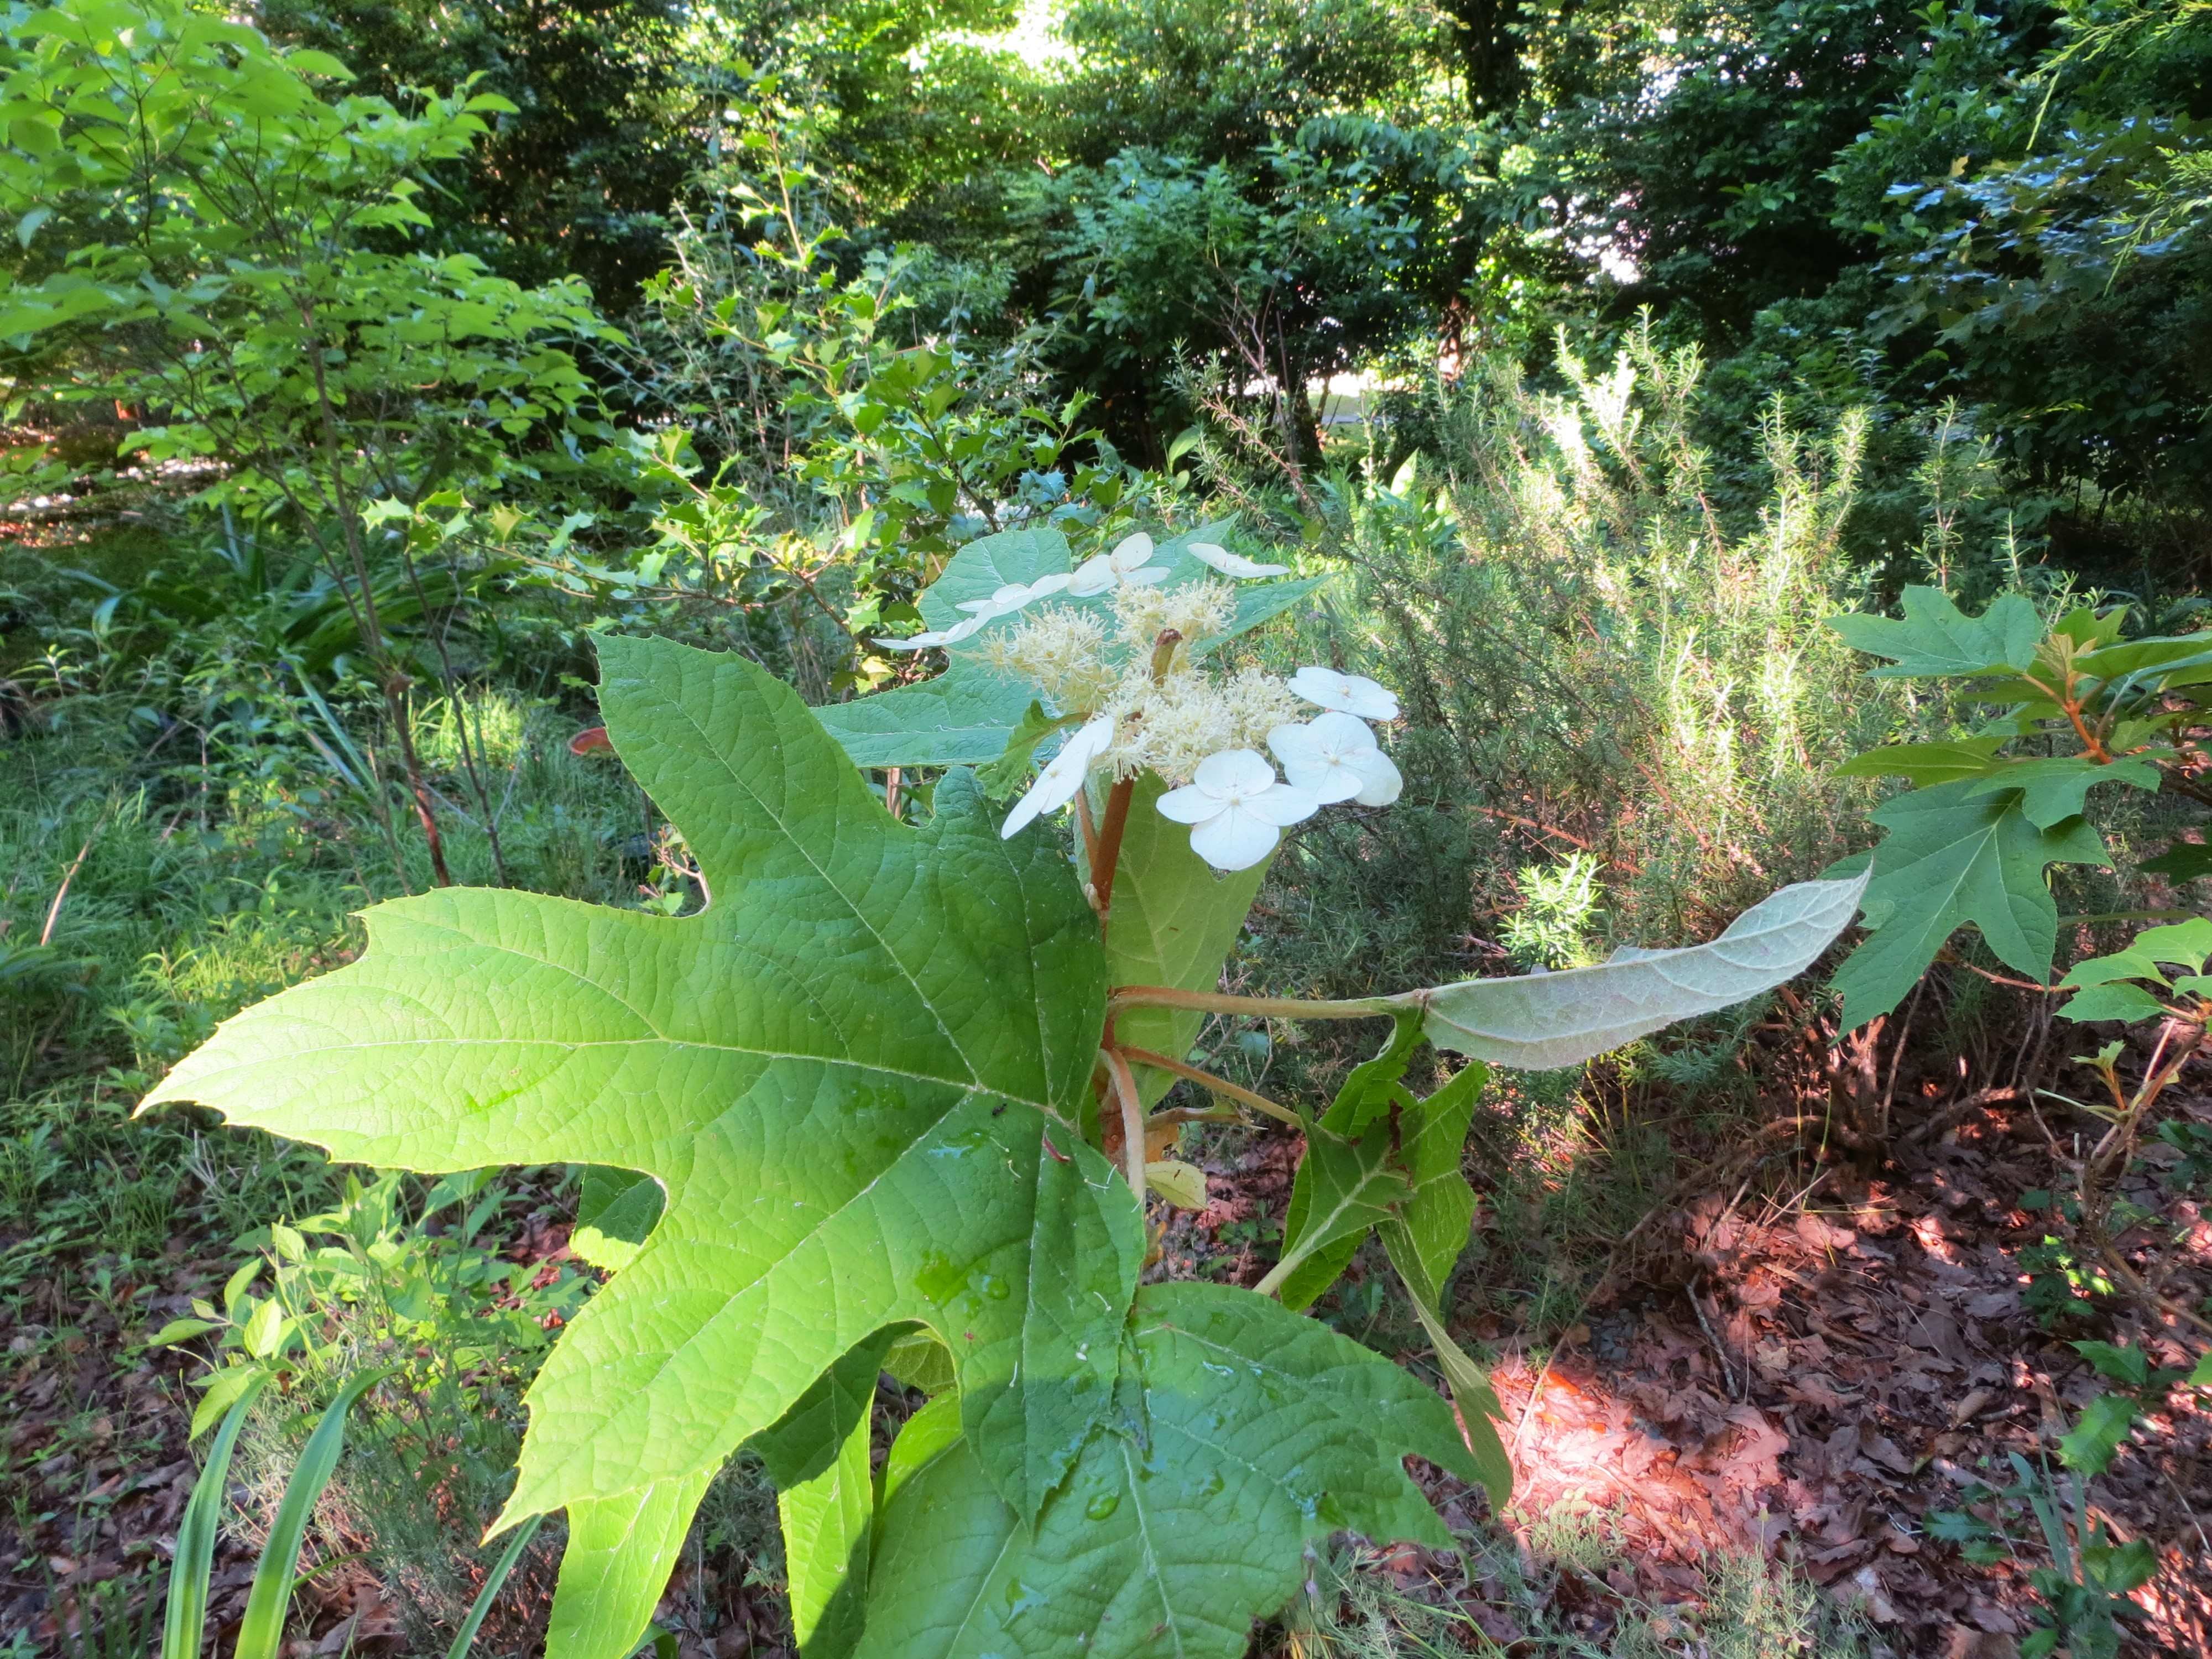

Oakleaf Hydrangea flowers last quite a bit longer, changing color and form slowly over the summer as even their skeletal remains persist into the winter. They are fun to cut for winter wreathes and dried arrangements, and their stems can still root as hardwood cuttings. I deadheaded the last of those from a shrub just last week. Most of our remaining Hydrangeas are budding or blooming this week, even the mophead H. macrophylla has started pumping out buds despite our cool weather. This is another beautiful flower that will bloom well in the shade.
The trick, here, is to keep a Hydrangea shrub alive long enough for it to grow taller than the deer can reach, because they do love to graze both leaves and flowers. Hydrangeas are easy to root from stem cuttings, but more challenging to grow on to maturity. I begin using deer repellents on and around them early in the season and keep renewing it, with fingers crossed, hoping for the best.
Since flowers prove so very tempting to the deer, I focus more on growing interesting foliage in most of our garden. Tropical Caladiums are as colorful as flowers and longer lasting. They love our hot and humid summers, but don’t tolerate cool, wet soil. I’ve been waiting for the weather to settle this spring to plant the Caladium ‘bulbs’ I saved last fall. (Growers call them bulbs for simplicity, but they aren’t true bulbs. Some folks call them corms and some call them rhizomes. They are structures from which both roots and stems emerge, like Iris rhizomes, but they don’t spread around like true rhizomes will.)
Once upon a time, I used to start Caladiums in flats or small nursery containers in late March. But in recent years I have found it much simpler to plant the bulb before it roots or grows, when I can tuck it into small spaces in containers with minimal disruption. The downside is there is no clue what color or pattern the leaf may be with saved ‘bulbs’ like these, so we will be surprised in a few weeks as the leaves emerge. I spray each bulb with Repels-all before planting, and then spray the entire container or planting area to discourage digging squirrels from pulling them out for a snack.
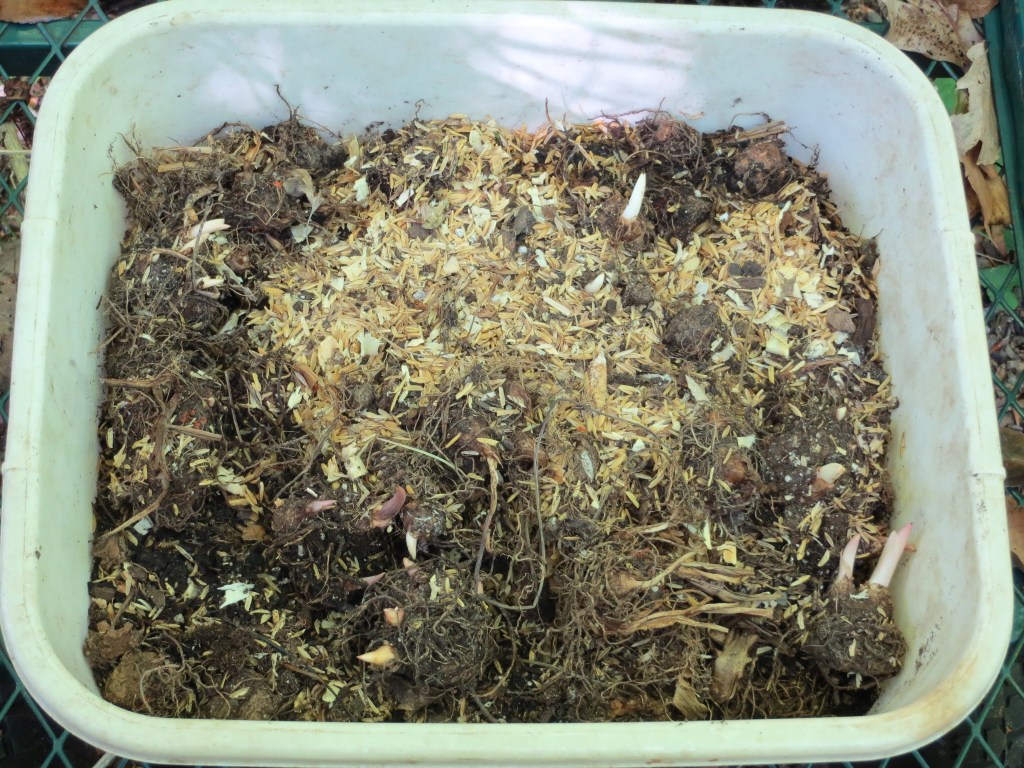
I dig the plants sometime in October, before it gets cold here, and lay the plants out in flats to dry in the basement. Once completely dried in late November, I pull off any remaining leaves and pack the rhizomes into mesh bags with the rice hulls that new bulbs are shipped with. These bags go into a larger paper or cloth bag to rest in a heated but dark area through the winter. They can’t freeze, even when dormant. I brought them out of storage this week and began planting those showing signs of growth. The rest are resting in damp potting mix, and the rice hulls, and I’ll plant them in the coming days as they break dormancy.

This is also the time for pricking out tiny sporeling ferns that grew through the winter. Every fern grower seems to devise their own system based on their own resources and the ferns they grow. I have been tweaking my system amid both failures and successes for the past few years now. Snails or slugs enjoyed the last batch of sporelings I potted into 4″ pots and grew in a sealed, translucent plastic box. I grew them in the box to keep the soil moist and the ferns humid, but this method hasn’t given a high degree of success. The difficulty, for me, is caring adequately for the sporeling from the time it is about an inch or so tall until its roots are established enough for it to grow on normally, like any other adult fern.
So my current method is to sow spores into shallow, clear, repurposed plastic food containers. I ‘sterilize’ the soil with boiling water, let it cool, then sow spores harvested from a frond left to dry out in an envelope. I cover the seeded container with plastic cling wrap secured with a rubber band and let this dish sit in a warm, bright spot, while the spores begin to grow. Which may take many months….
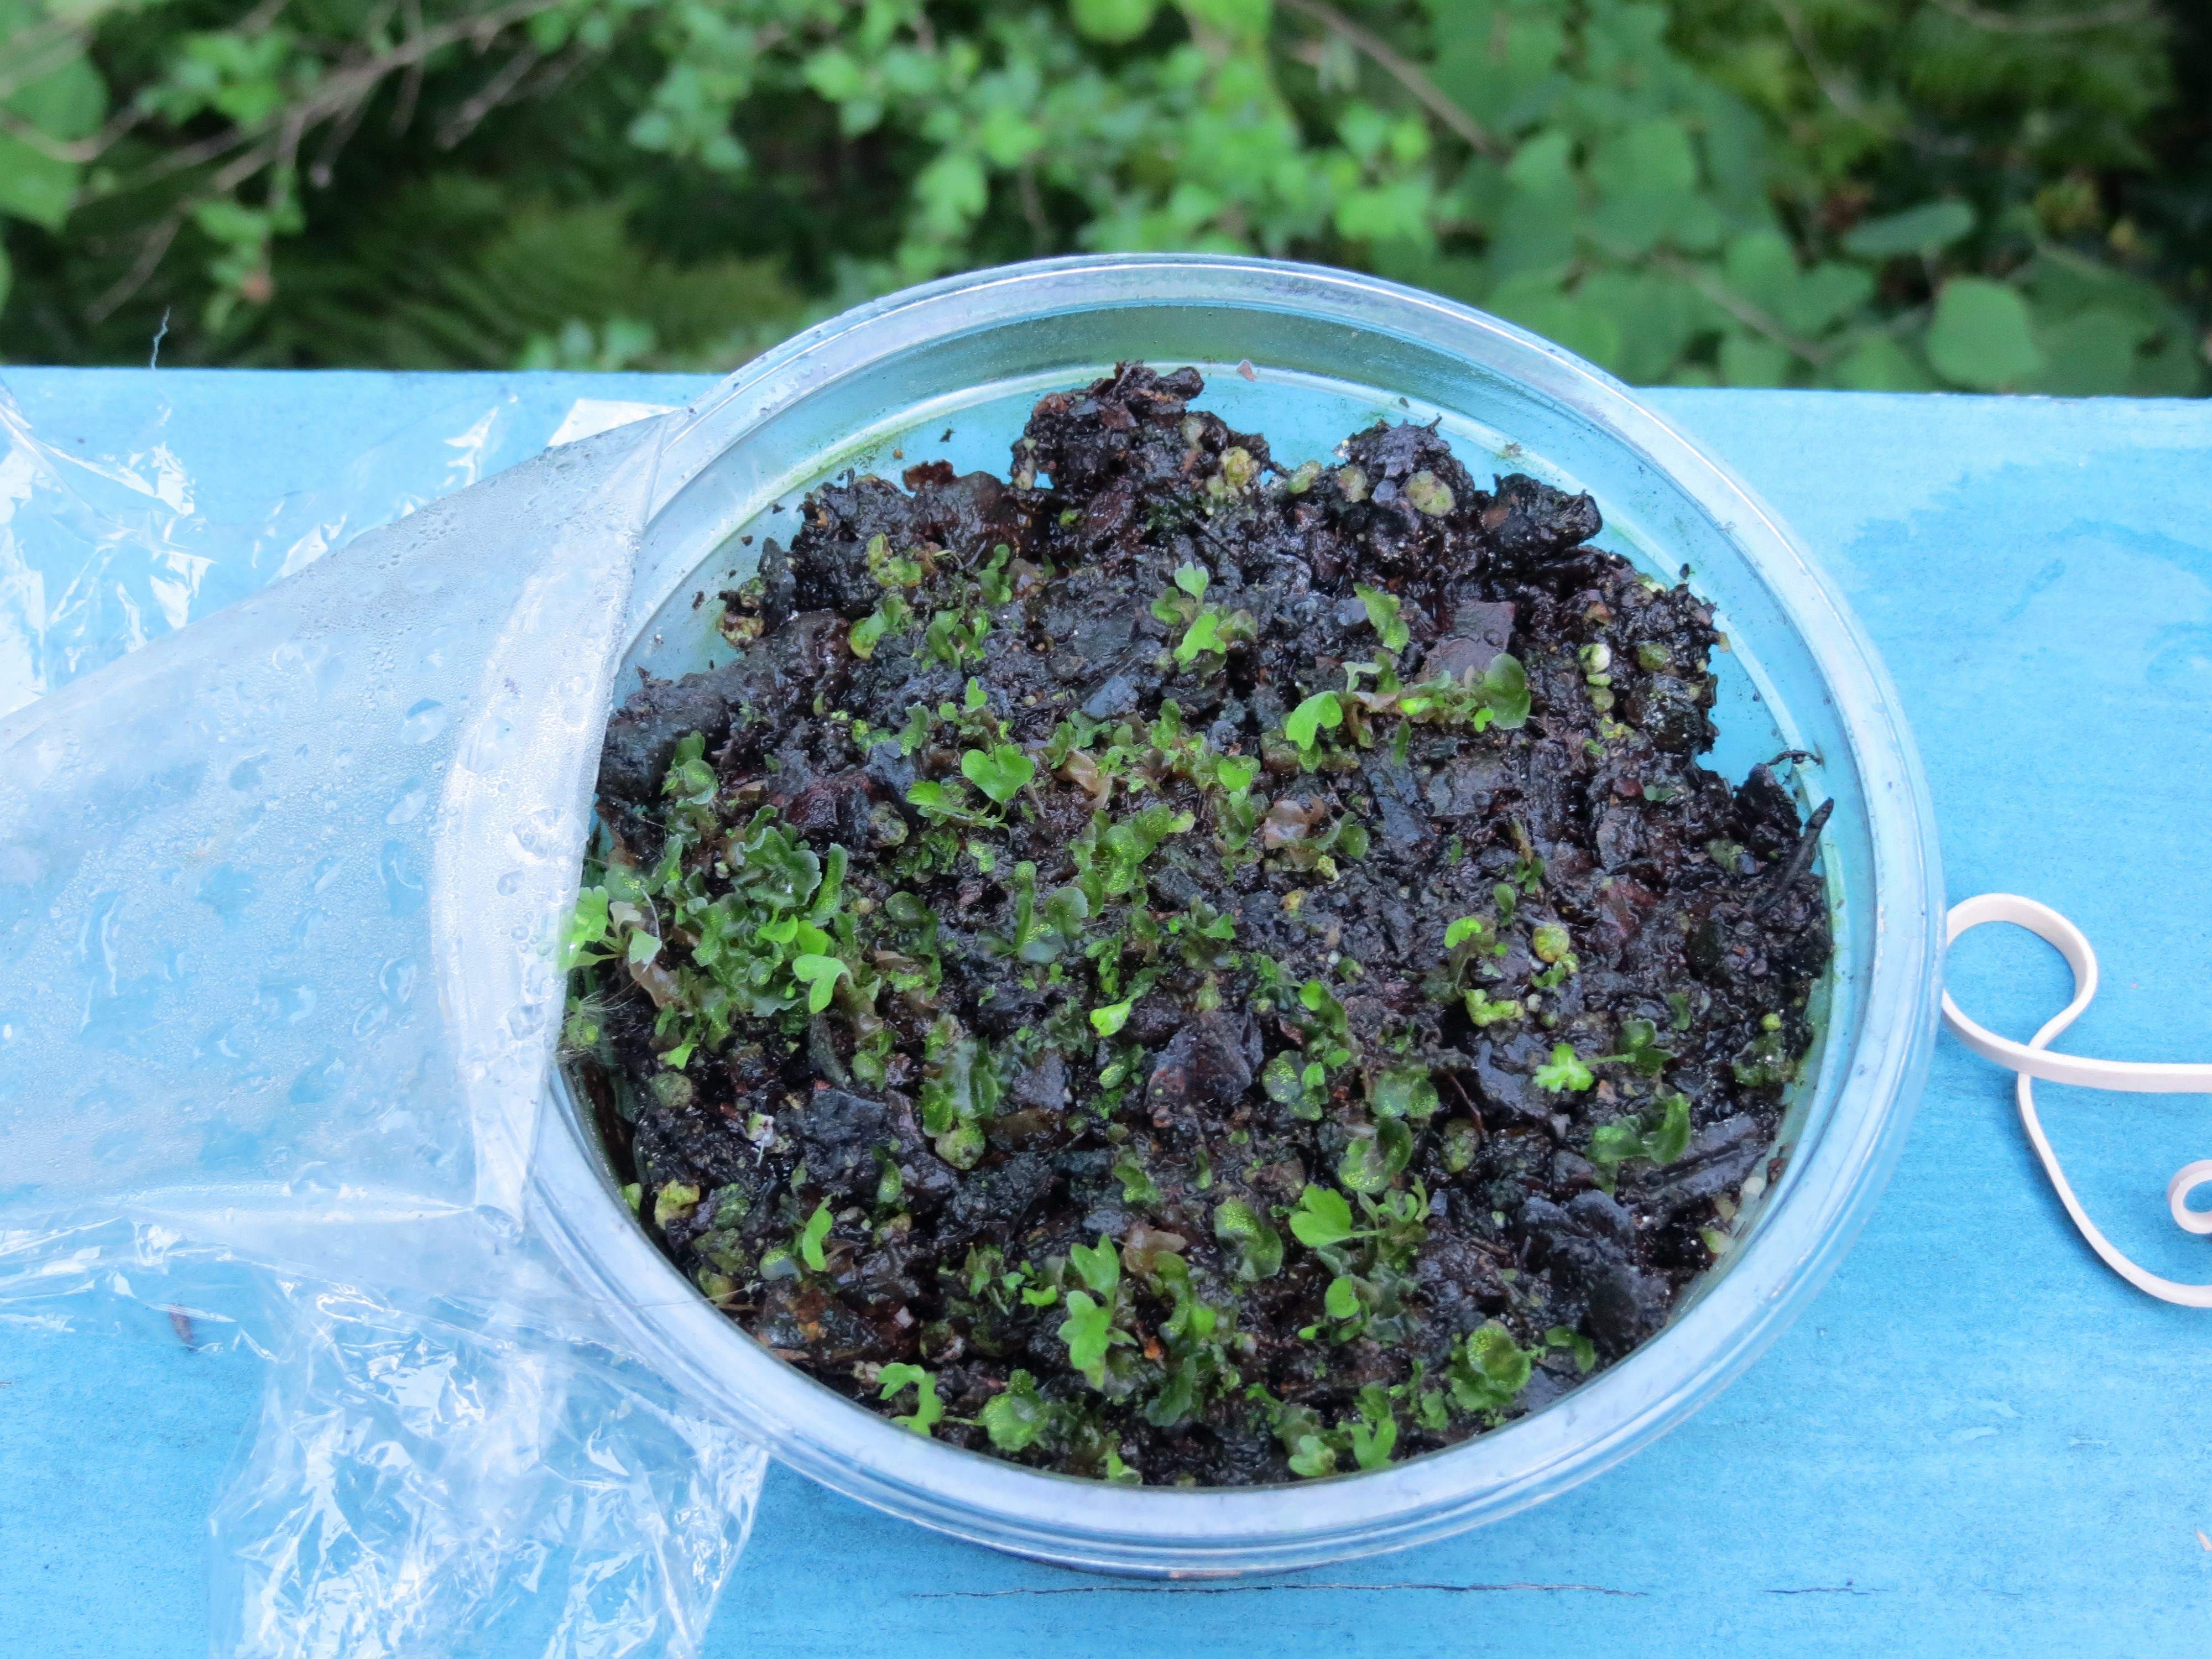
Spores may look like moss or algae during their early stages of growth, and require high moisture and high humidity. 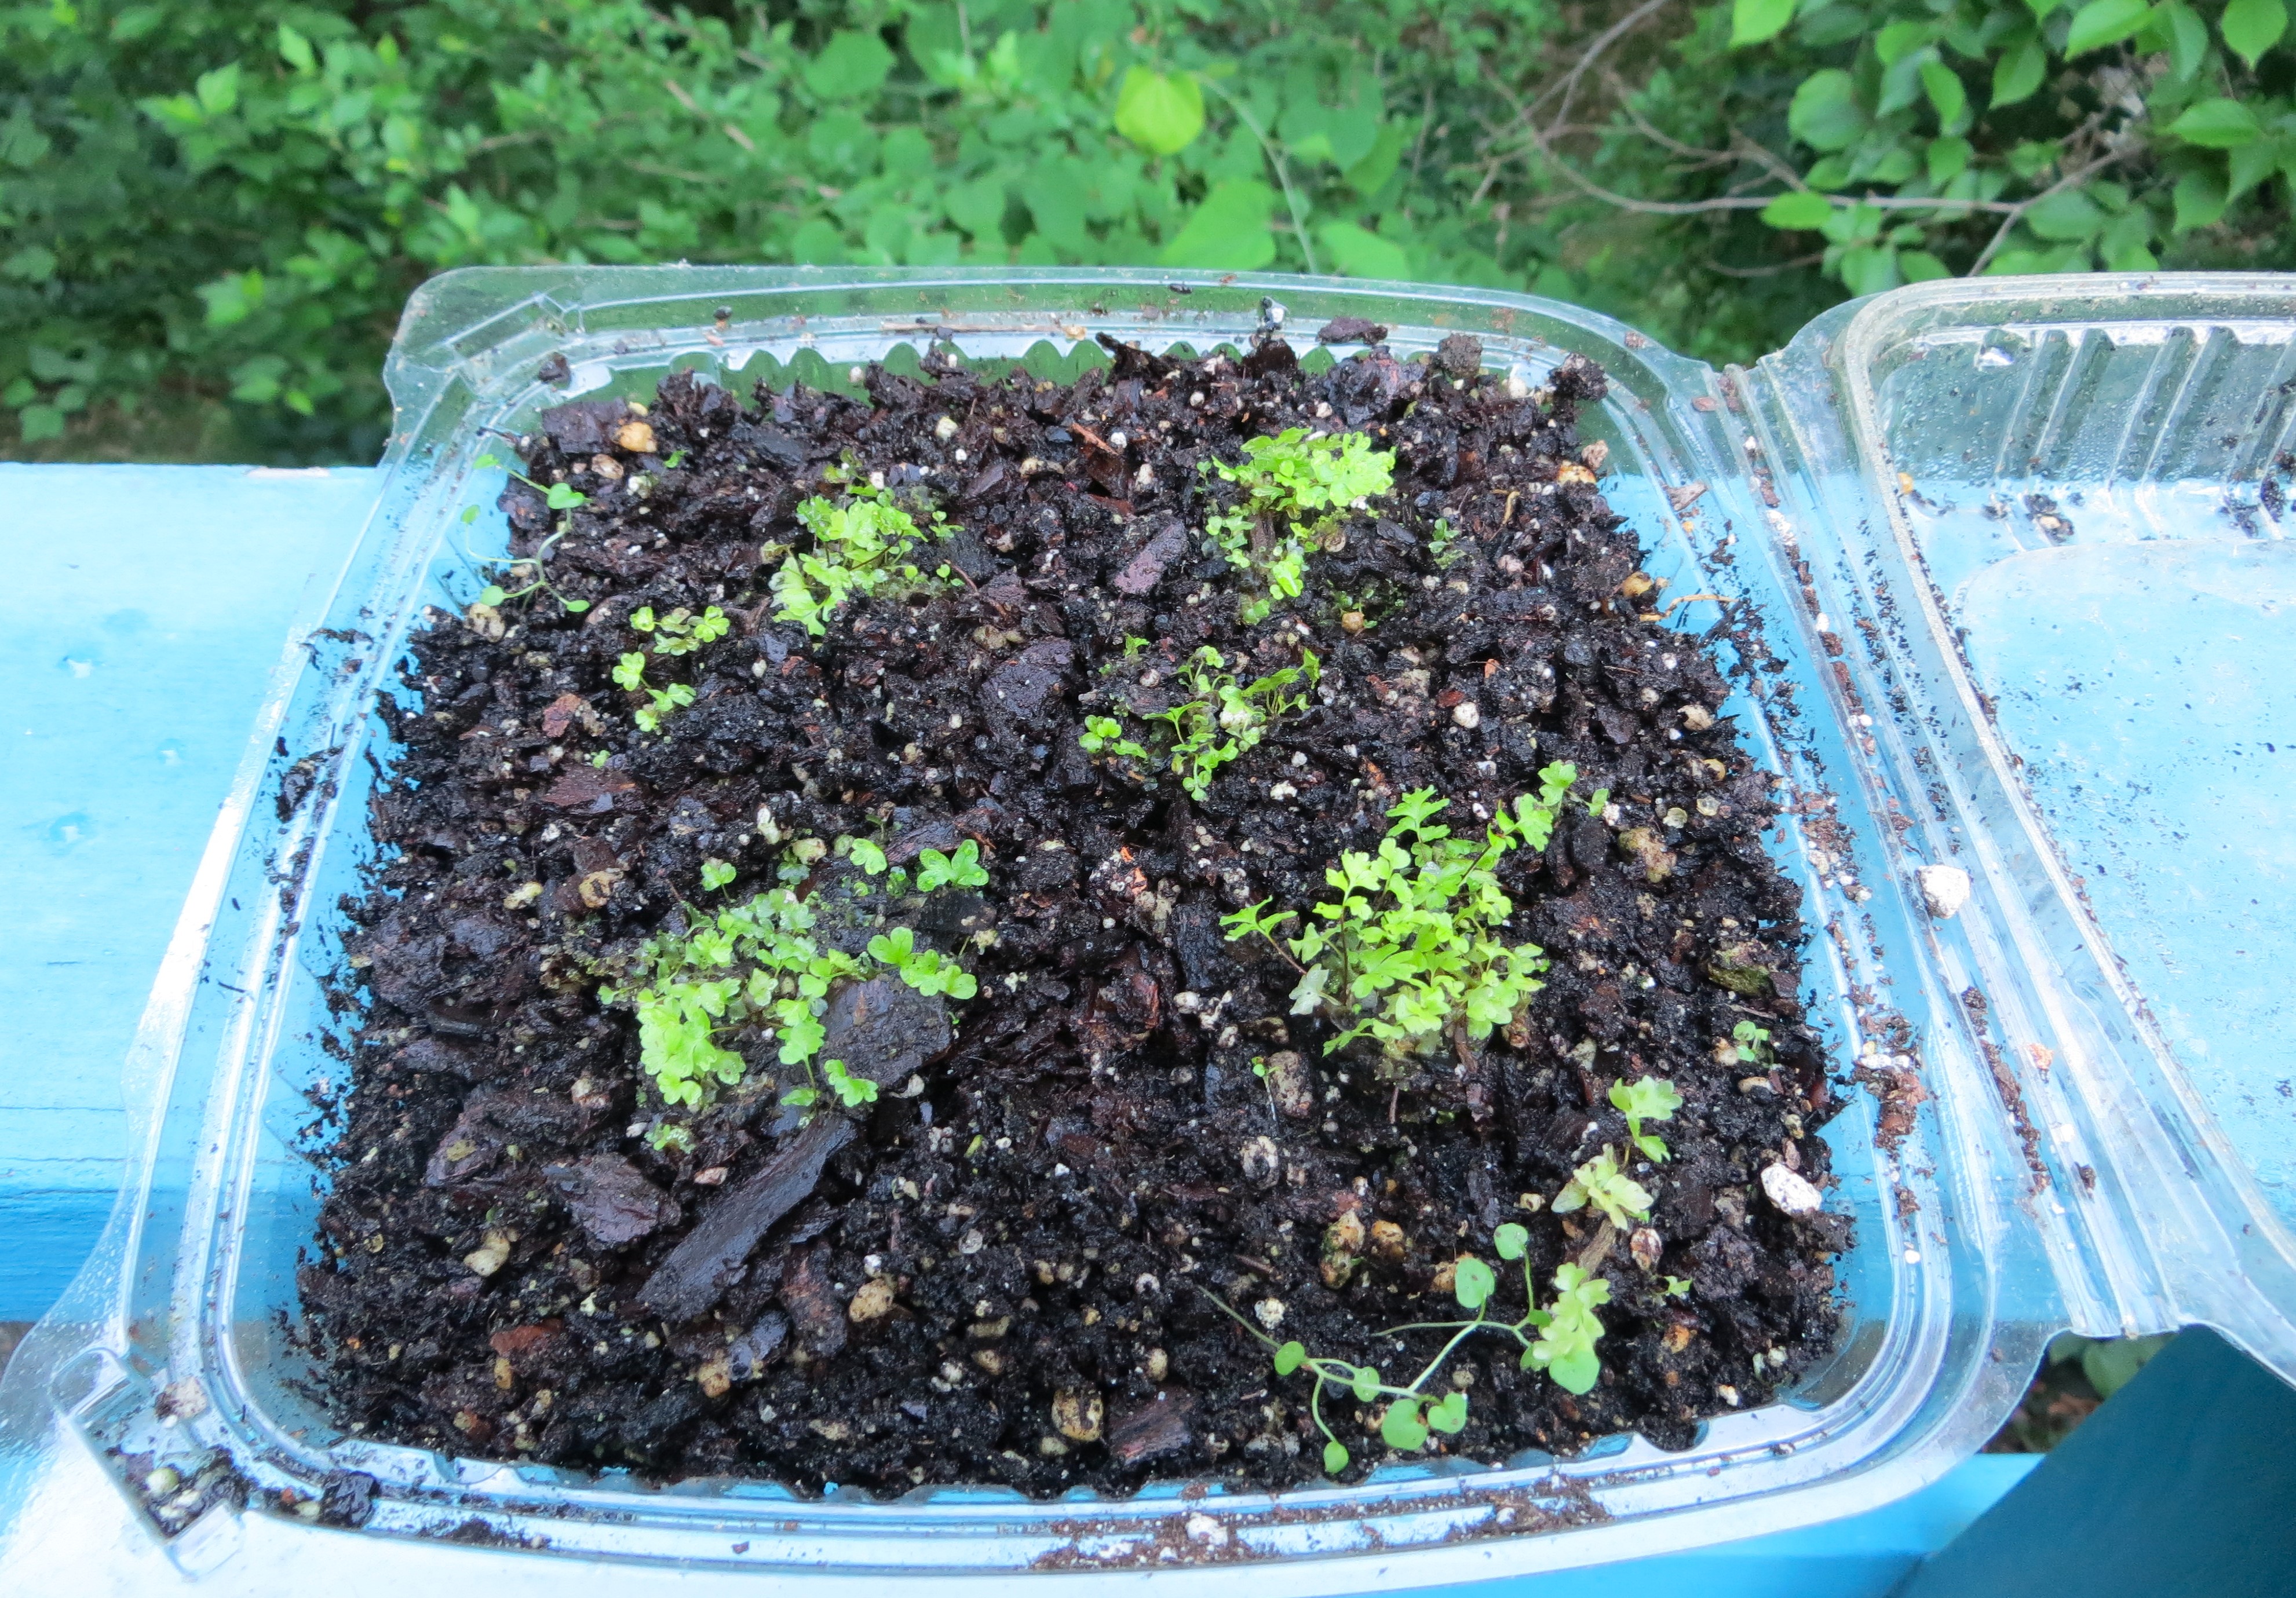
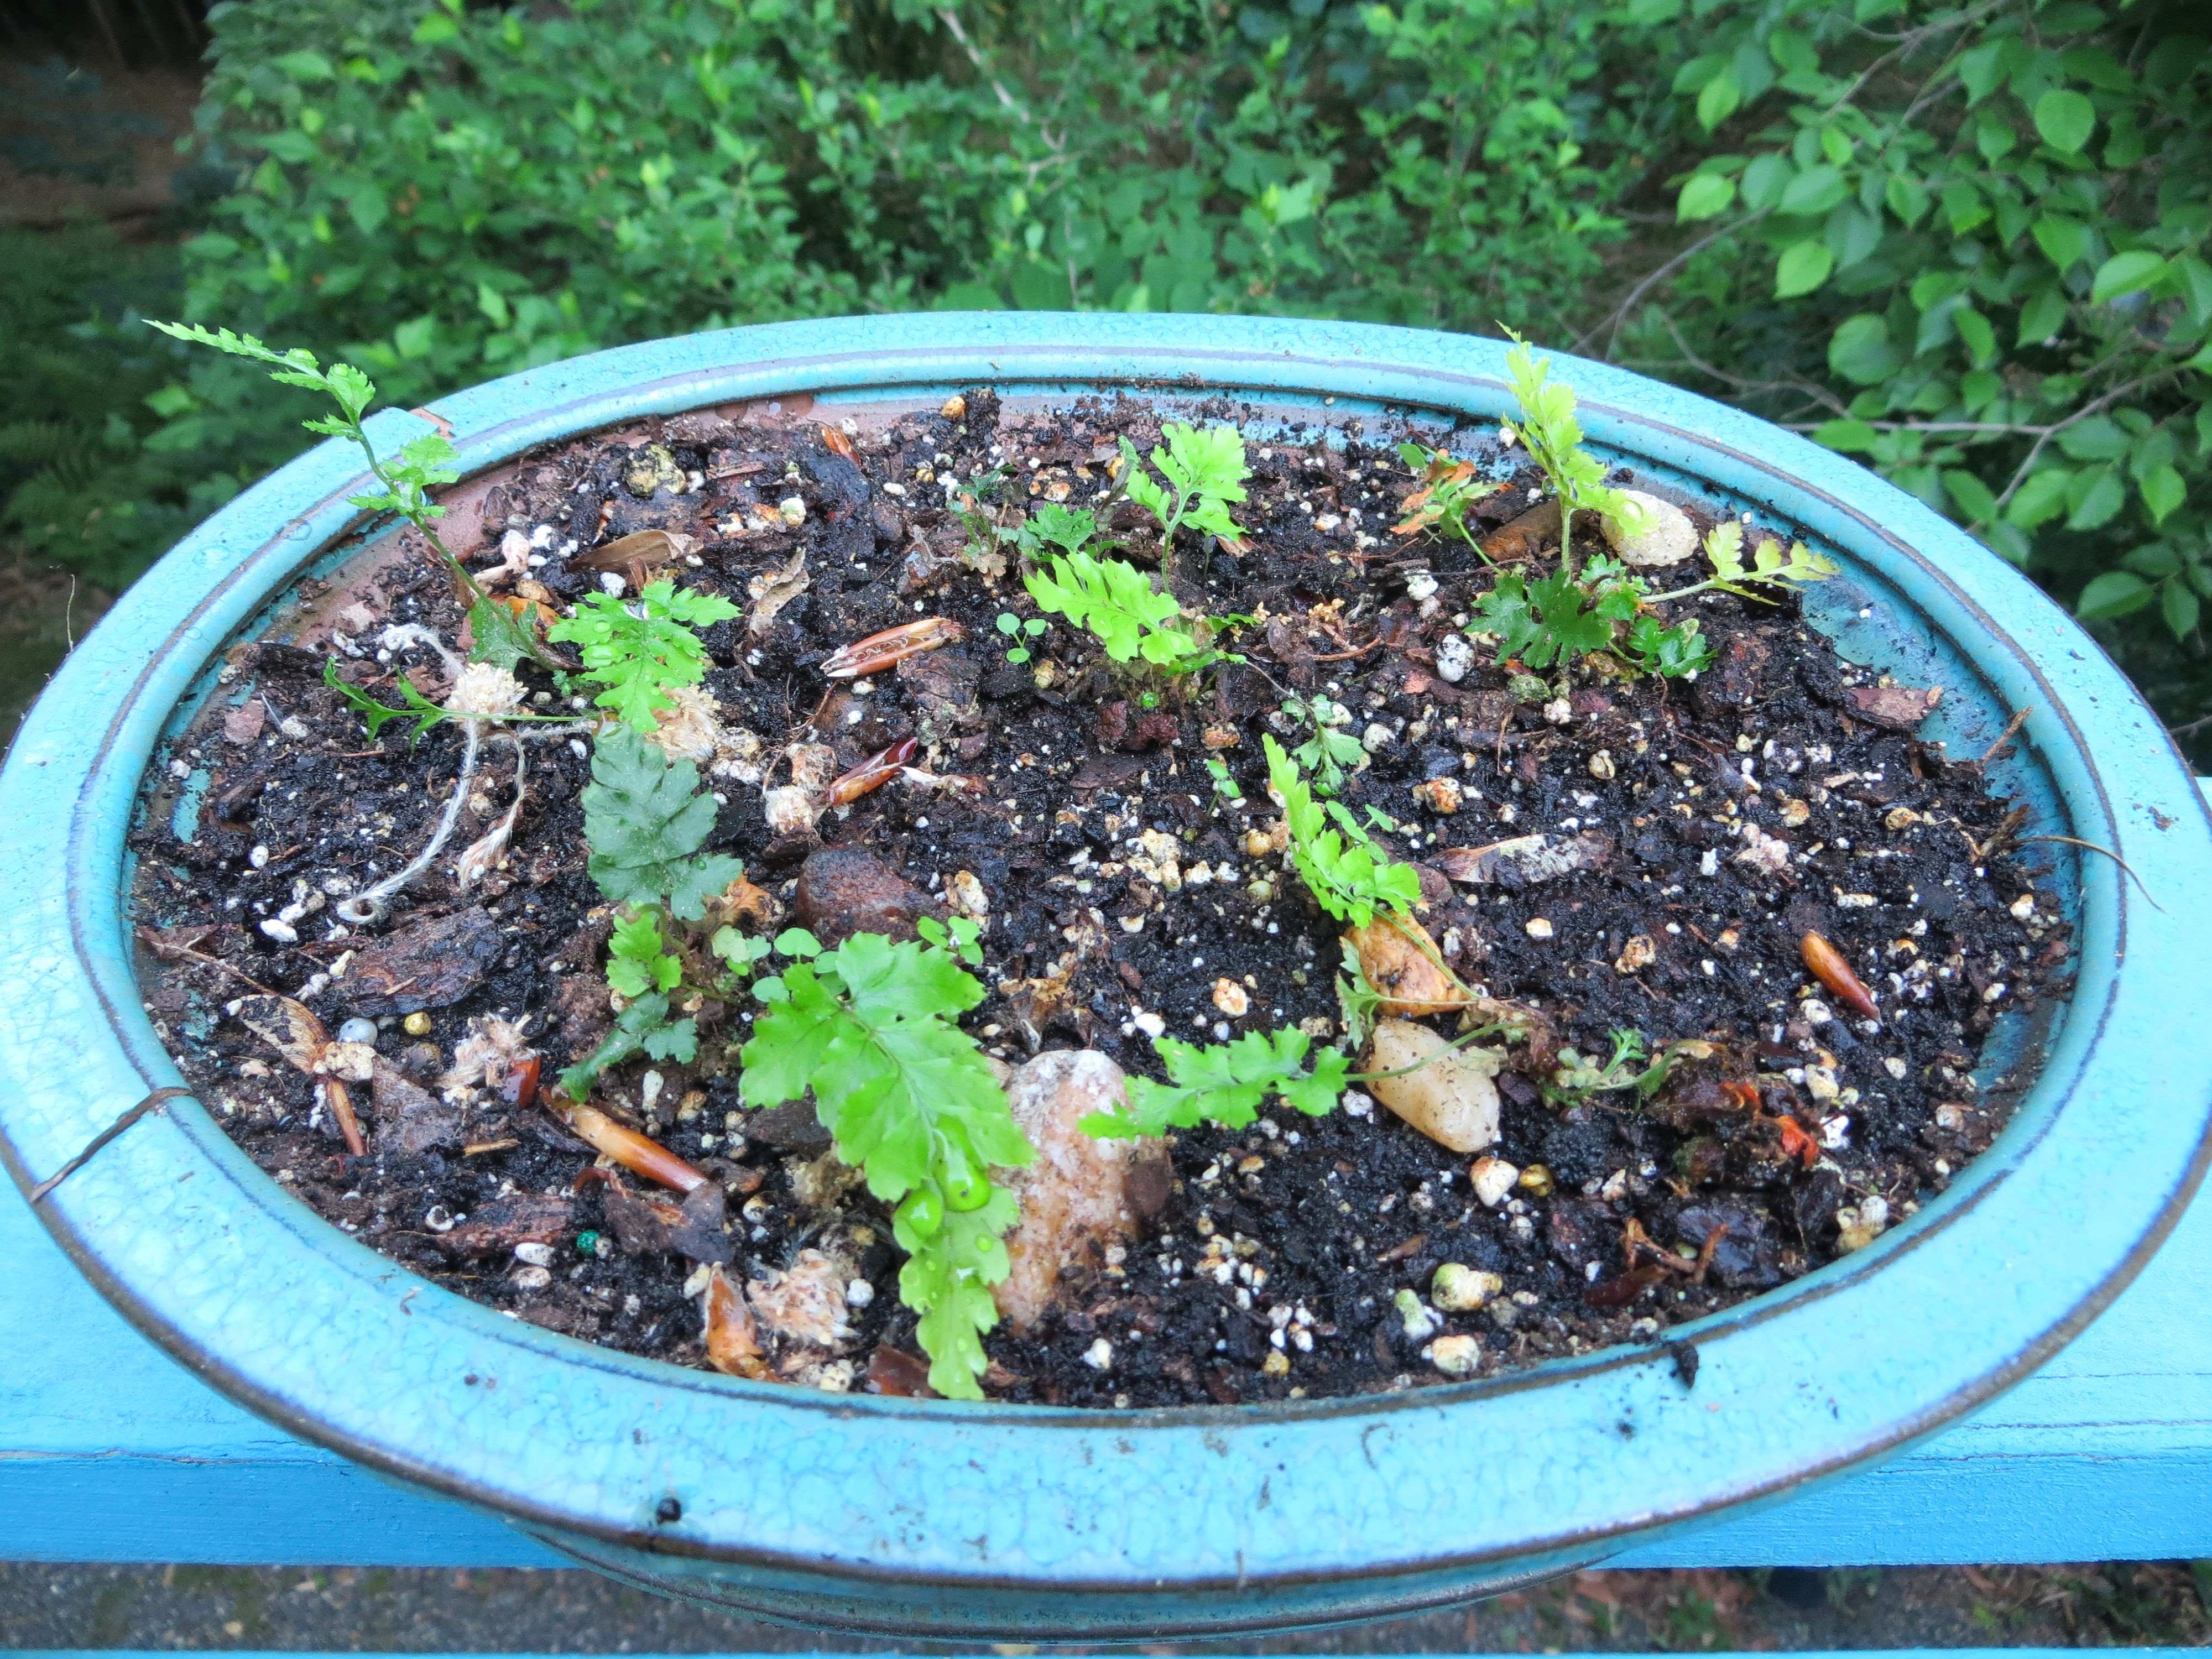
Once tiny fronds appear, clumps of plants should be transplanted to a larger container that still maintains moisture and humidity. 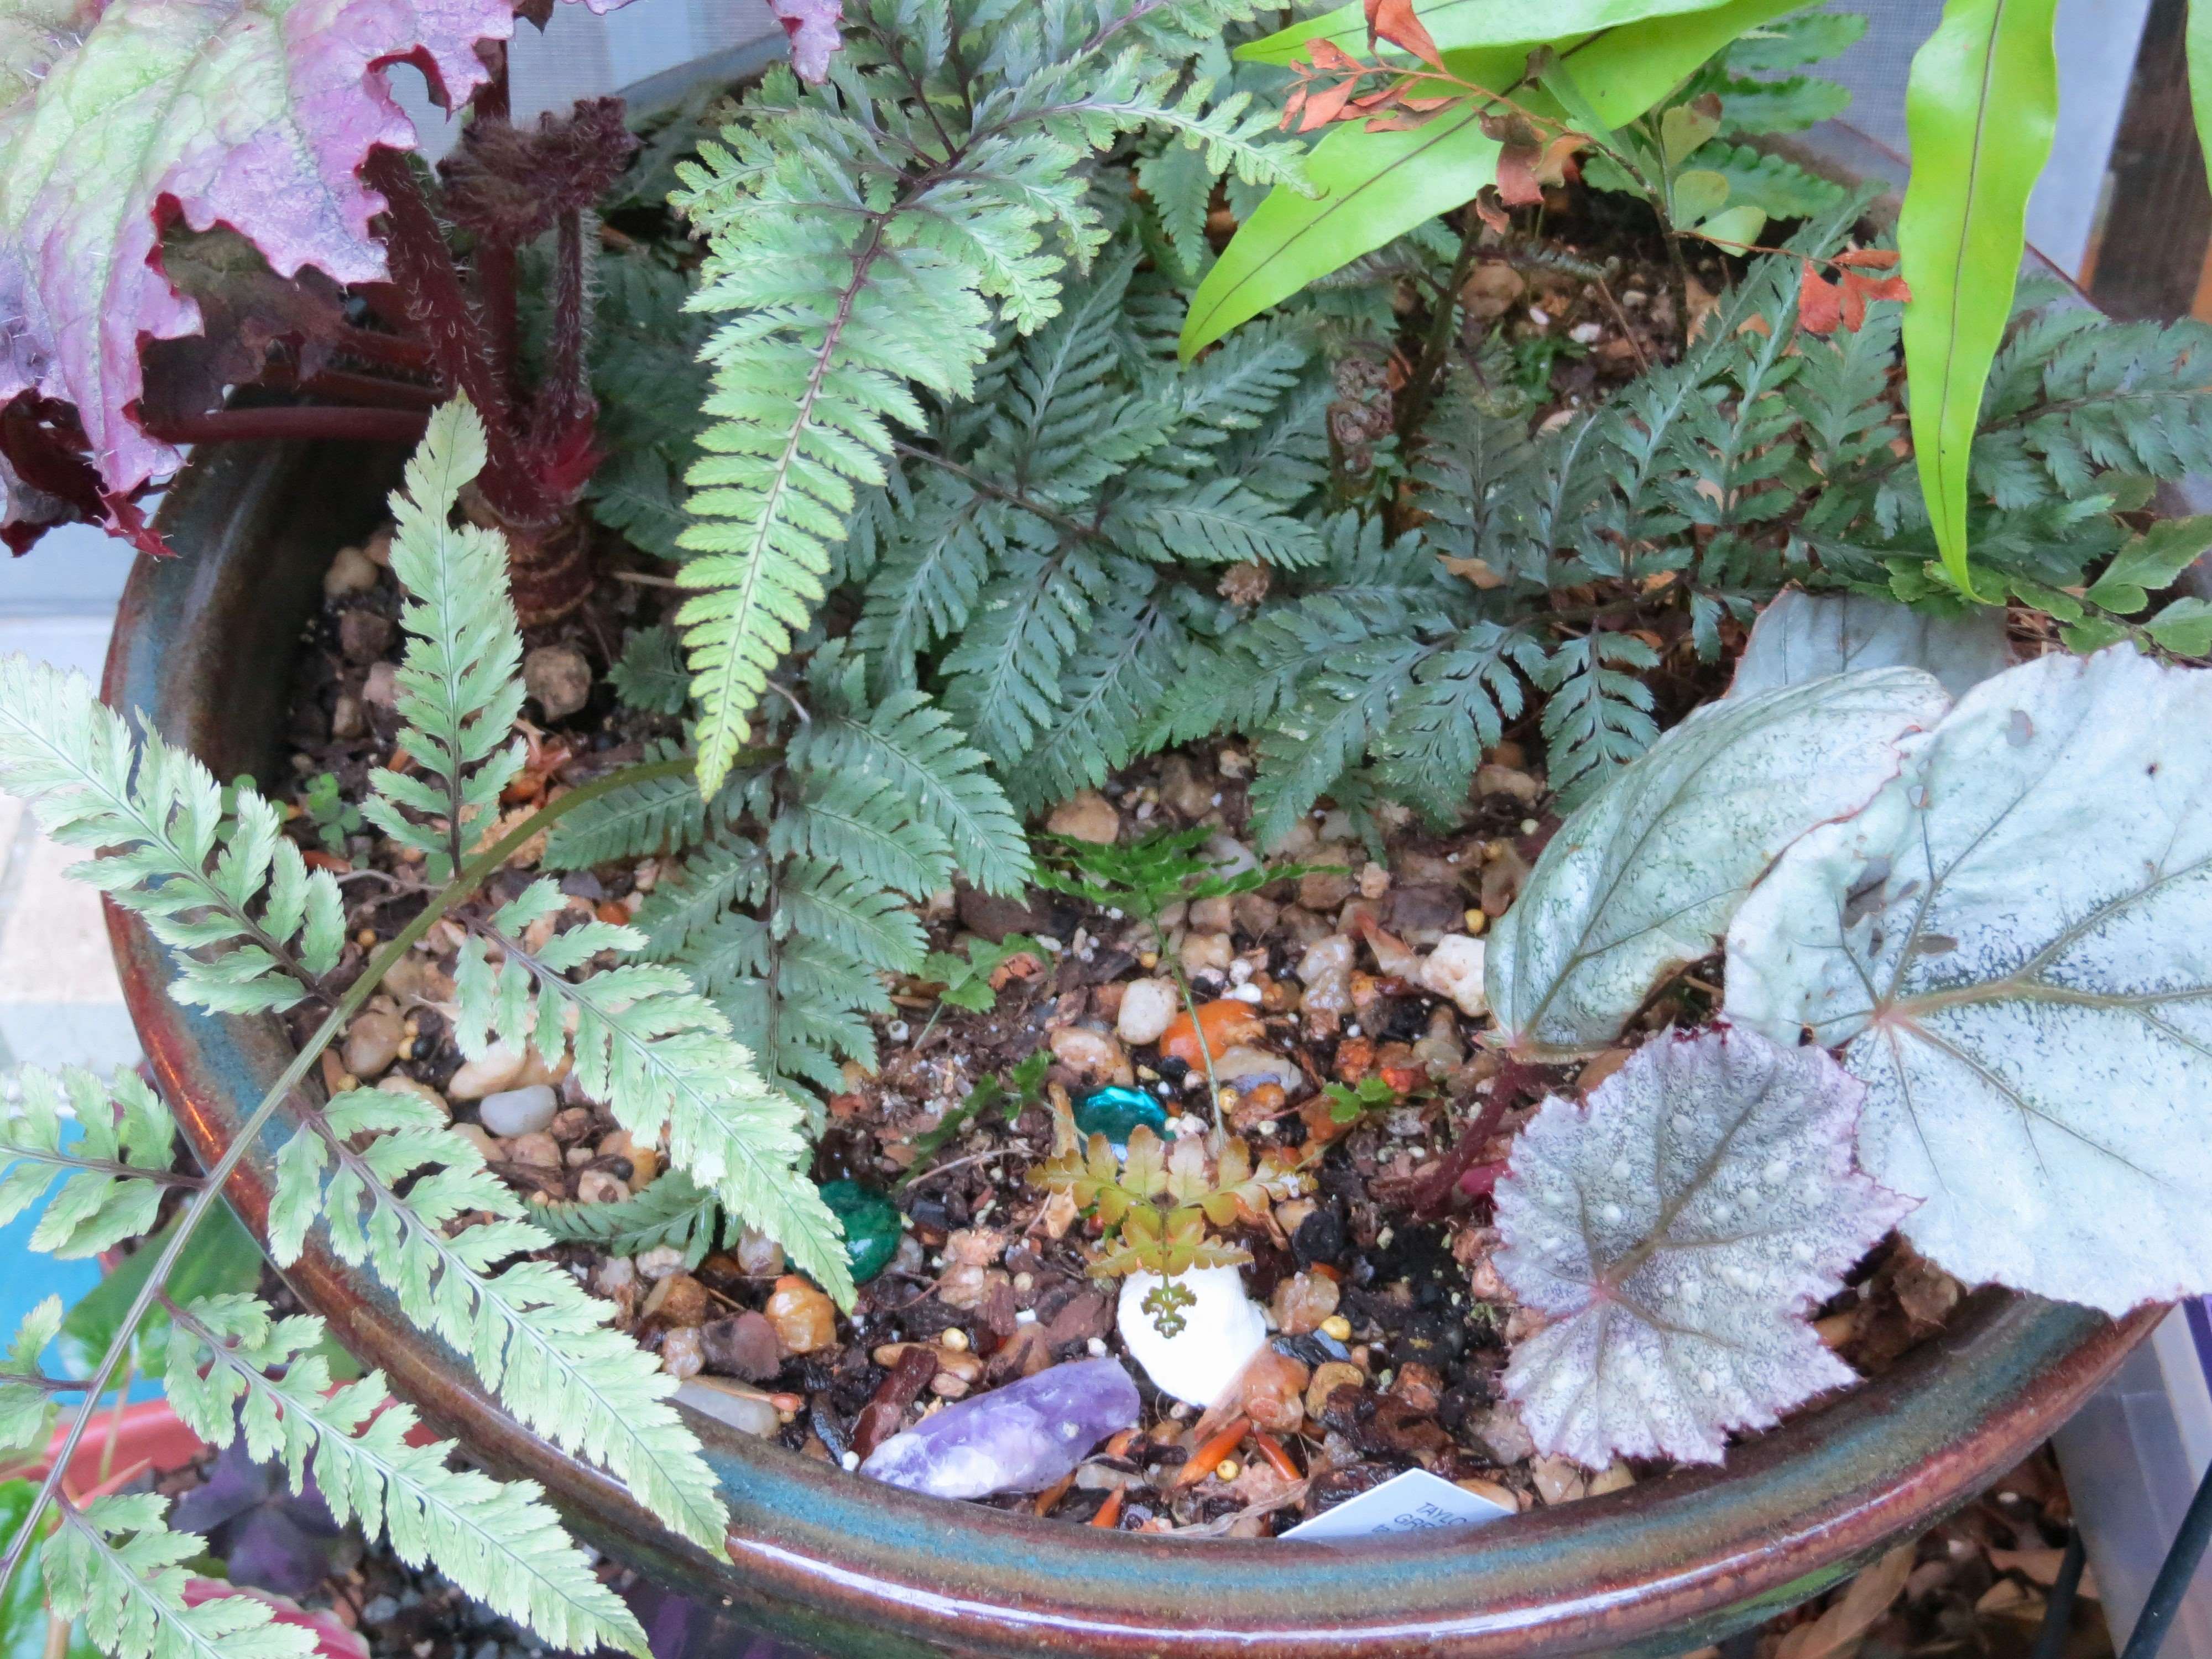
I transplanted this Dryopteris sporeling into an established container earlier this spring. The fern will need to be moved on in a few more weeks. 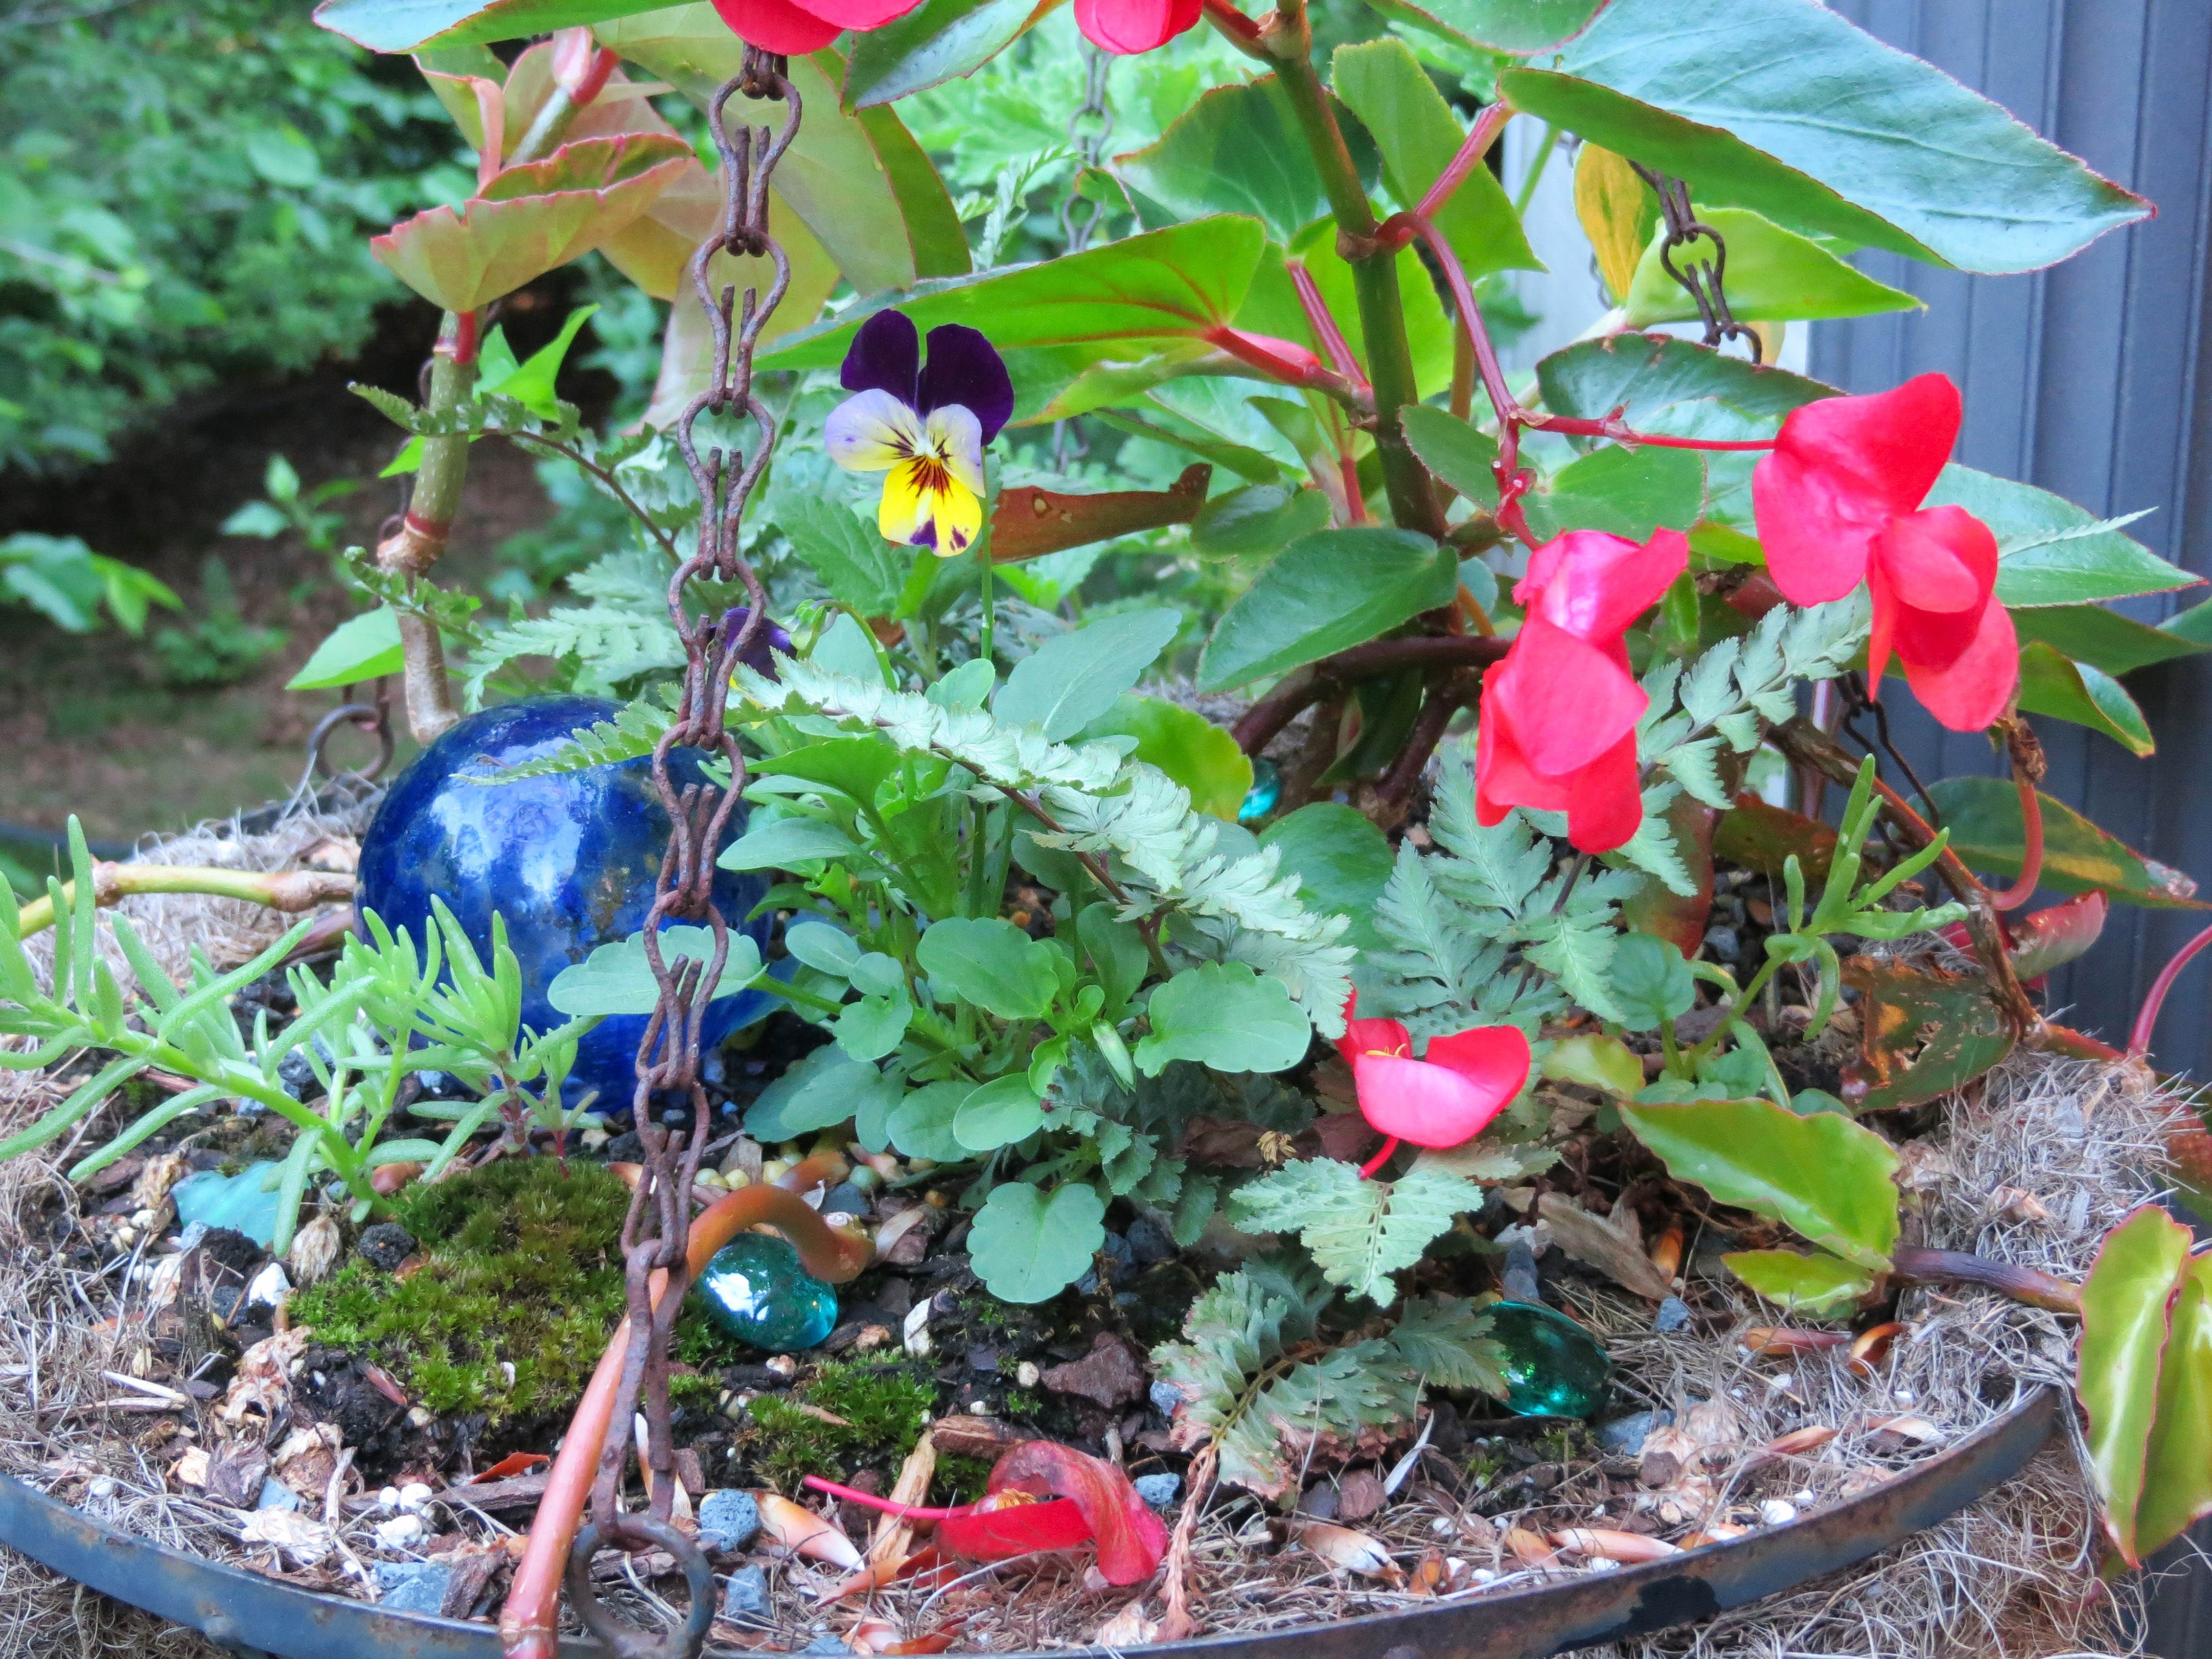
Athyrium sporelings were transplanted into this mixed basket in April. The Begonias were all rooted stems saved from last summer.
Once the various stages of early growth have occurred and the tiny plants have grown some fronds, I dig up the little clumps with a spoon and transplant them into a larger, clear, re-purposed clam-shell container filled with fresh potting mix. These grow on for several months in their sealed environment in a shady spot on our deck. They can stay outside through the winter so long as the ferns are hardy. The challenge comes in where to plant the tiny ferns when the sporelings begin to outgrow this nursery. And it has worked well for me to plant them on into either a container under larger plants, or into a re-purposed shallow bonsai dish. At this stage the container must have good drainage, and yet must provide consistent moisture and humidity.
Once the sporeling has a good root system and several fronds, it can be treated like a mature fern. I had a container that had grown crowded with ferns in various stages of growth, where more mature ferns had fostered and protected younger ones for the past several years. It was time to divide the plants, removing several to give those remaining more room to grow. And I needed several young ferns to repair an area of erosion at the top of one of our fern gardens. And so on a cloudy morning this week, I set to work to gently tease those intertwined root systems apart to free some ferns from their happy home so they could go out into the wider world as individuals.
While this new planting bed isn’t particularly ‘pretty’ yet, I am looking forward to watching these Athyriums grow into their potential in good, fresh compost. I mulched and finished this new planting area with ‘Perma-till,’ which should further help to stop the erosion here and also discourage digging critters. It will blend in better, in time, and these clumps will slowly expand to eventually cover the compost/perma-till patch on our bank.
The moral of this tale is, as always, to do the best you can with what you have at hand. Whatever the challenge may be, there is a way to move forward. While it may not be what you planned, the outcome may be even better than you had expected. And, always remember to see the beauty in each step of the journey.
Once sporelings, these now grown ferns are ready for life as individuals. 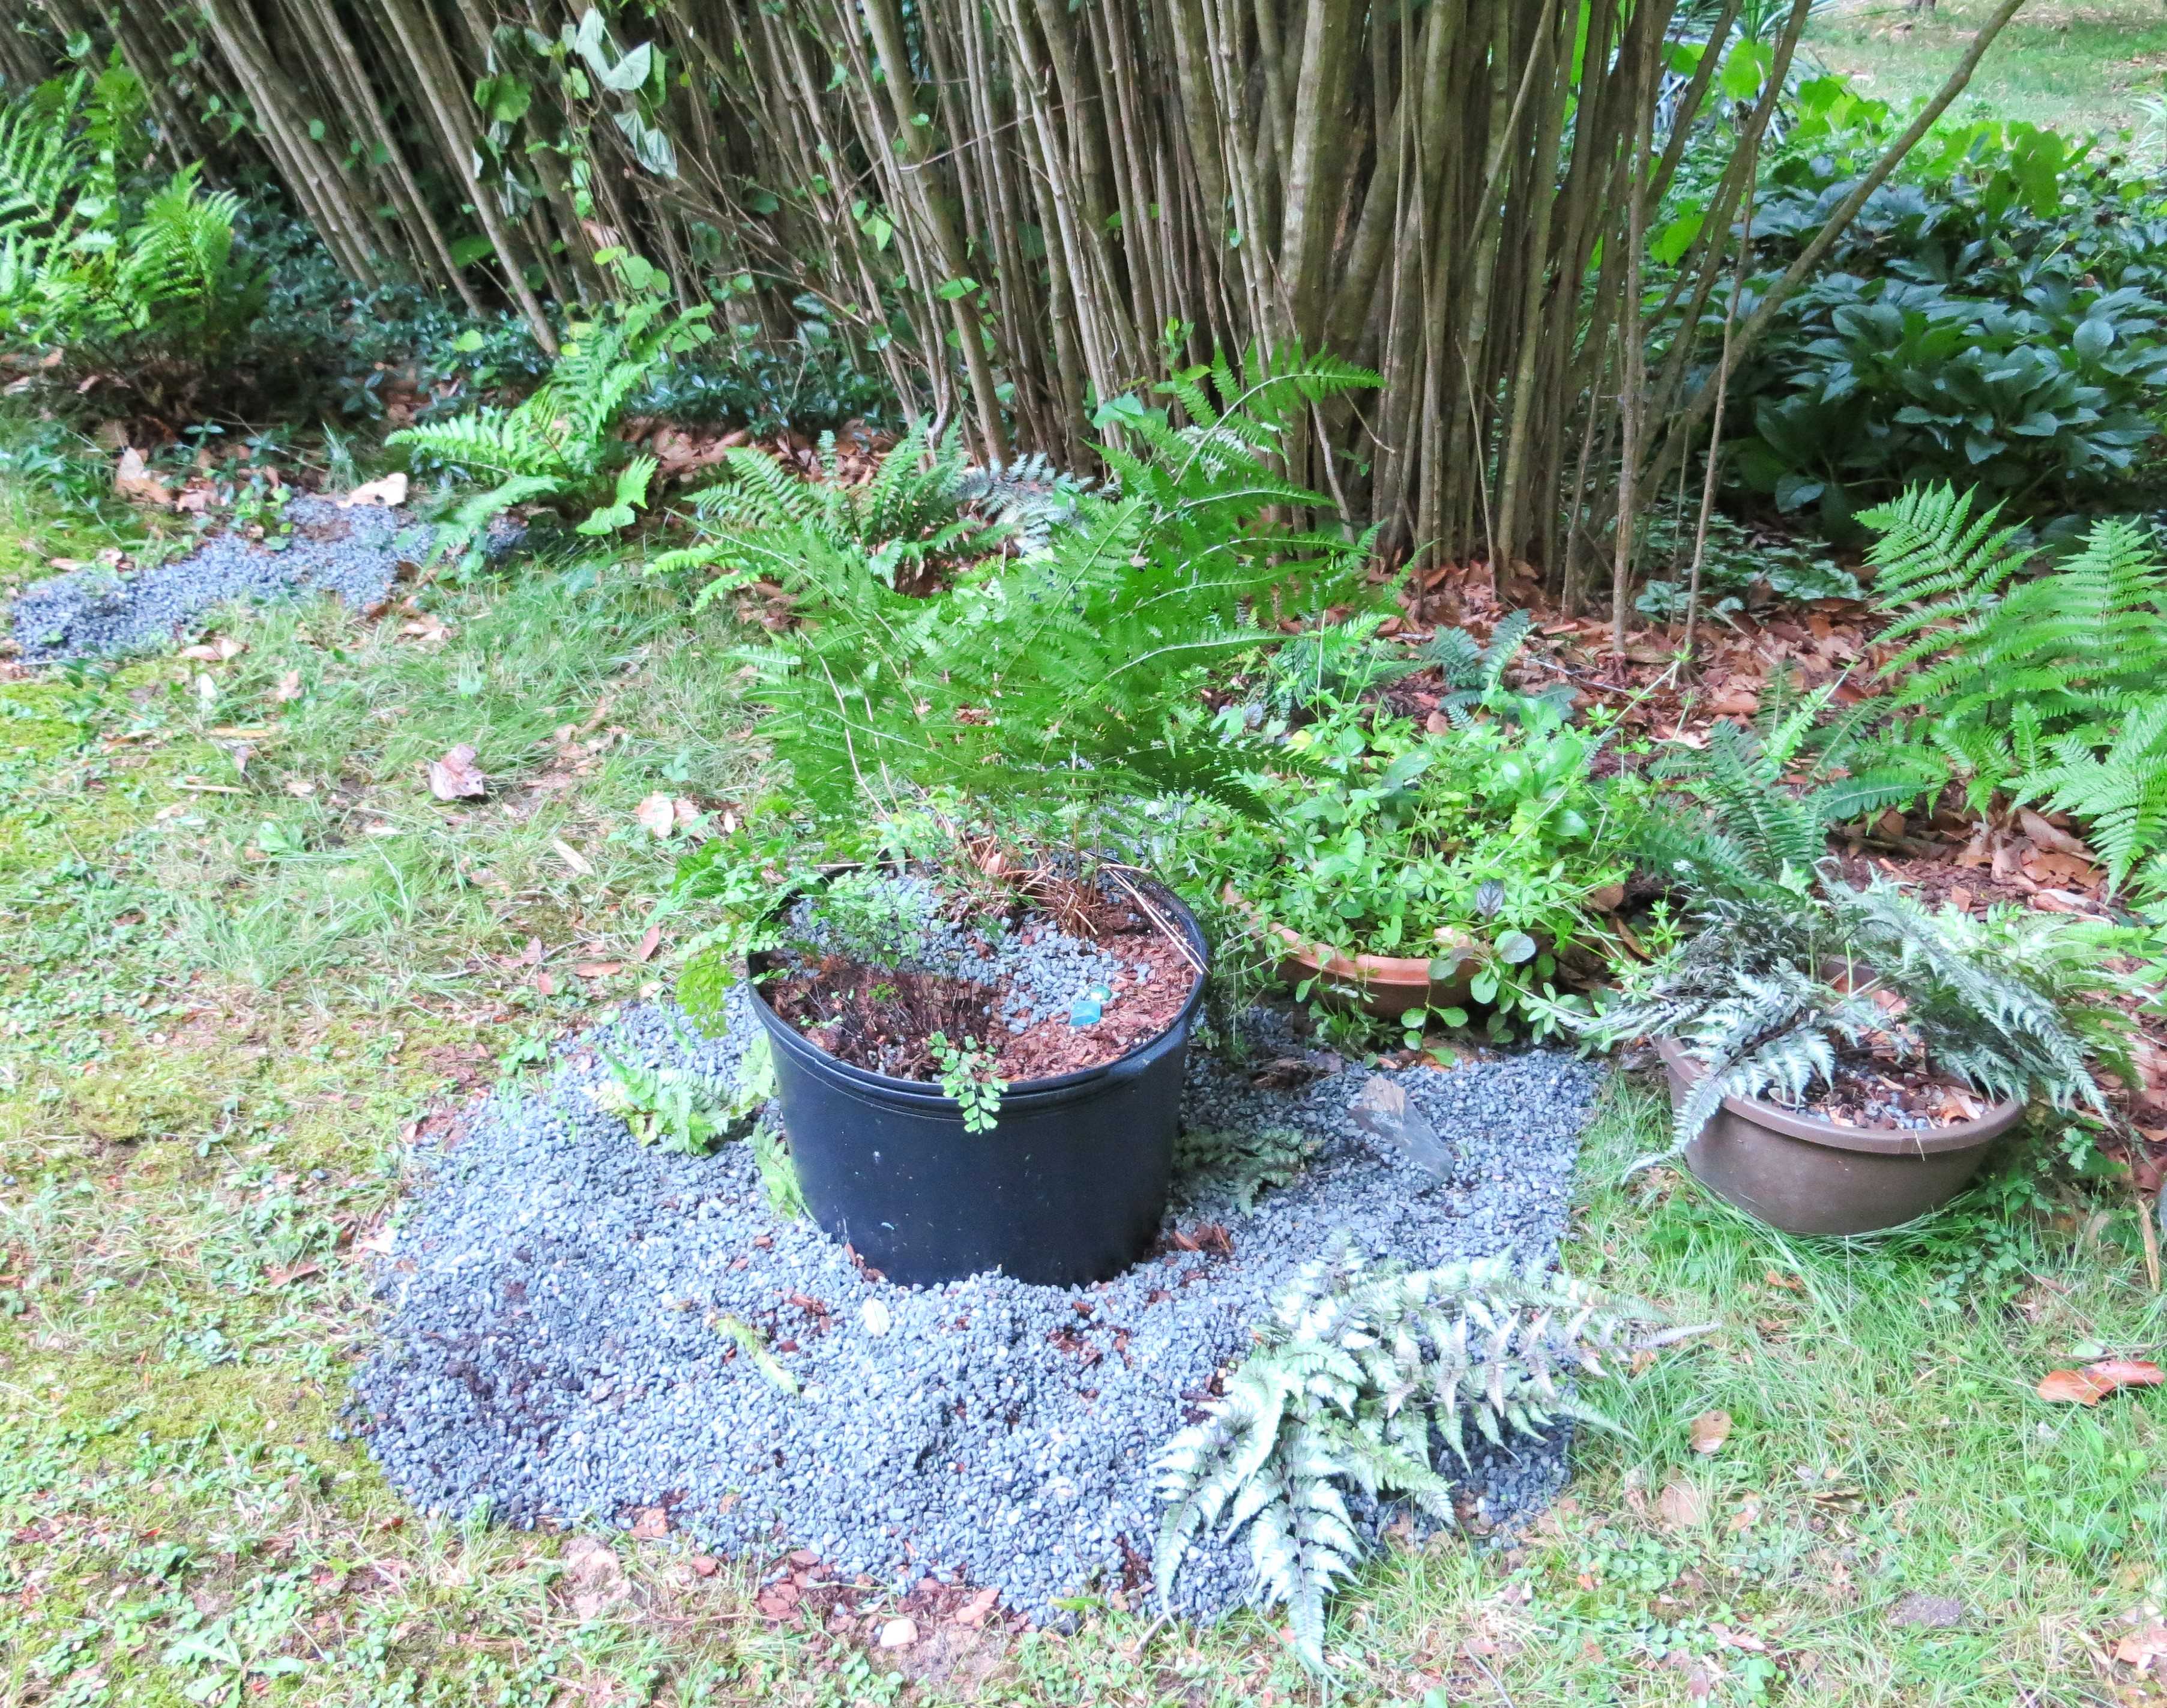
A wider view of the newly patched area where we had significant erosion after heavy rains last week. 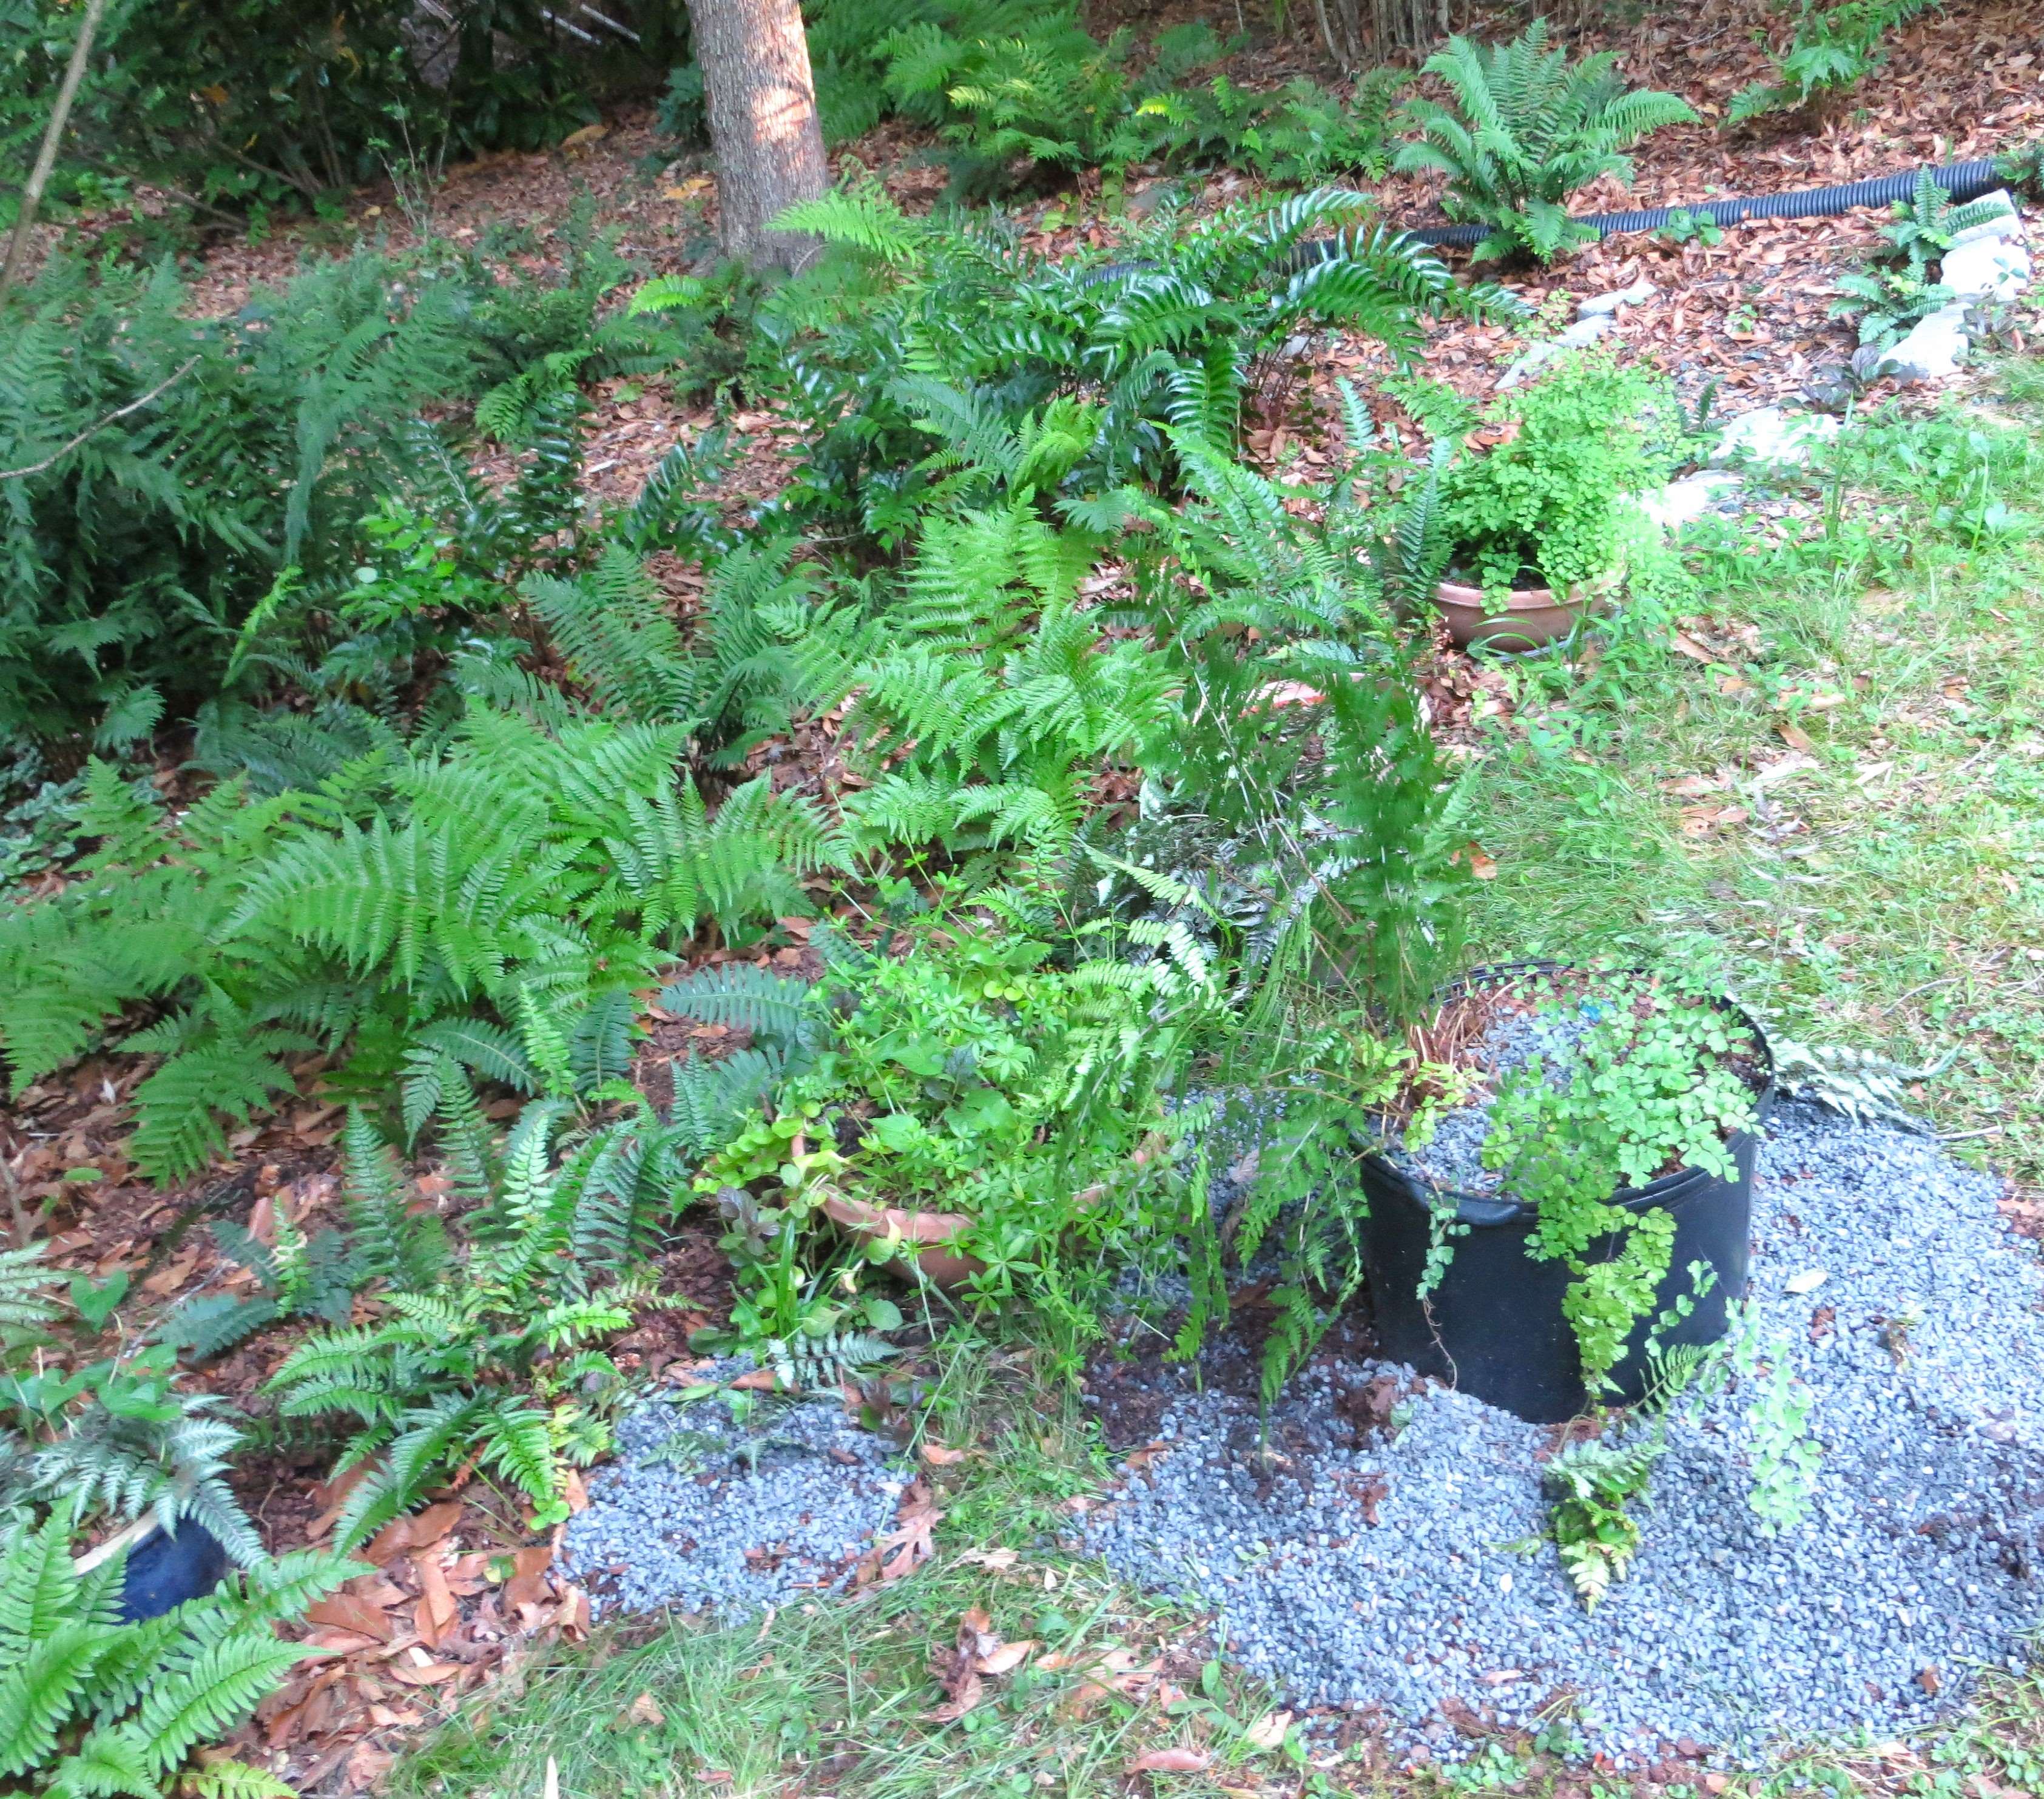
The patch from another angle 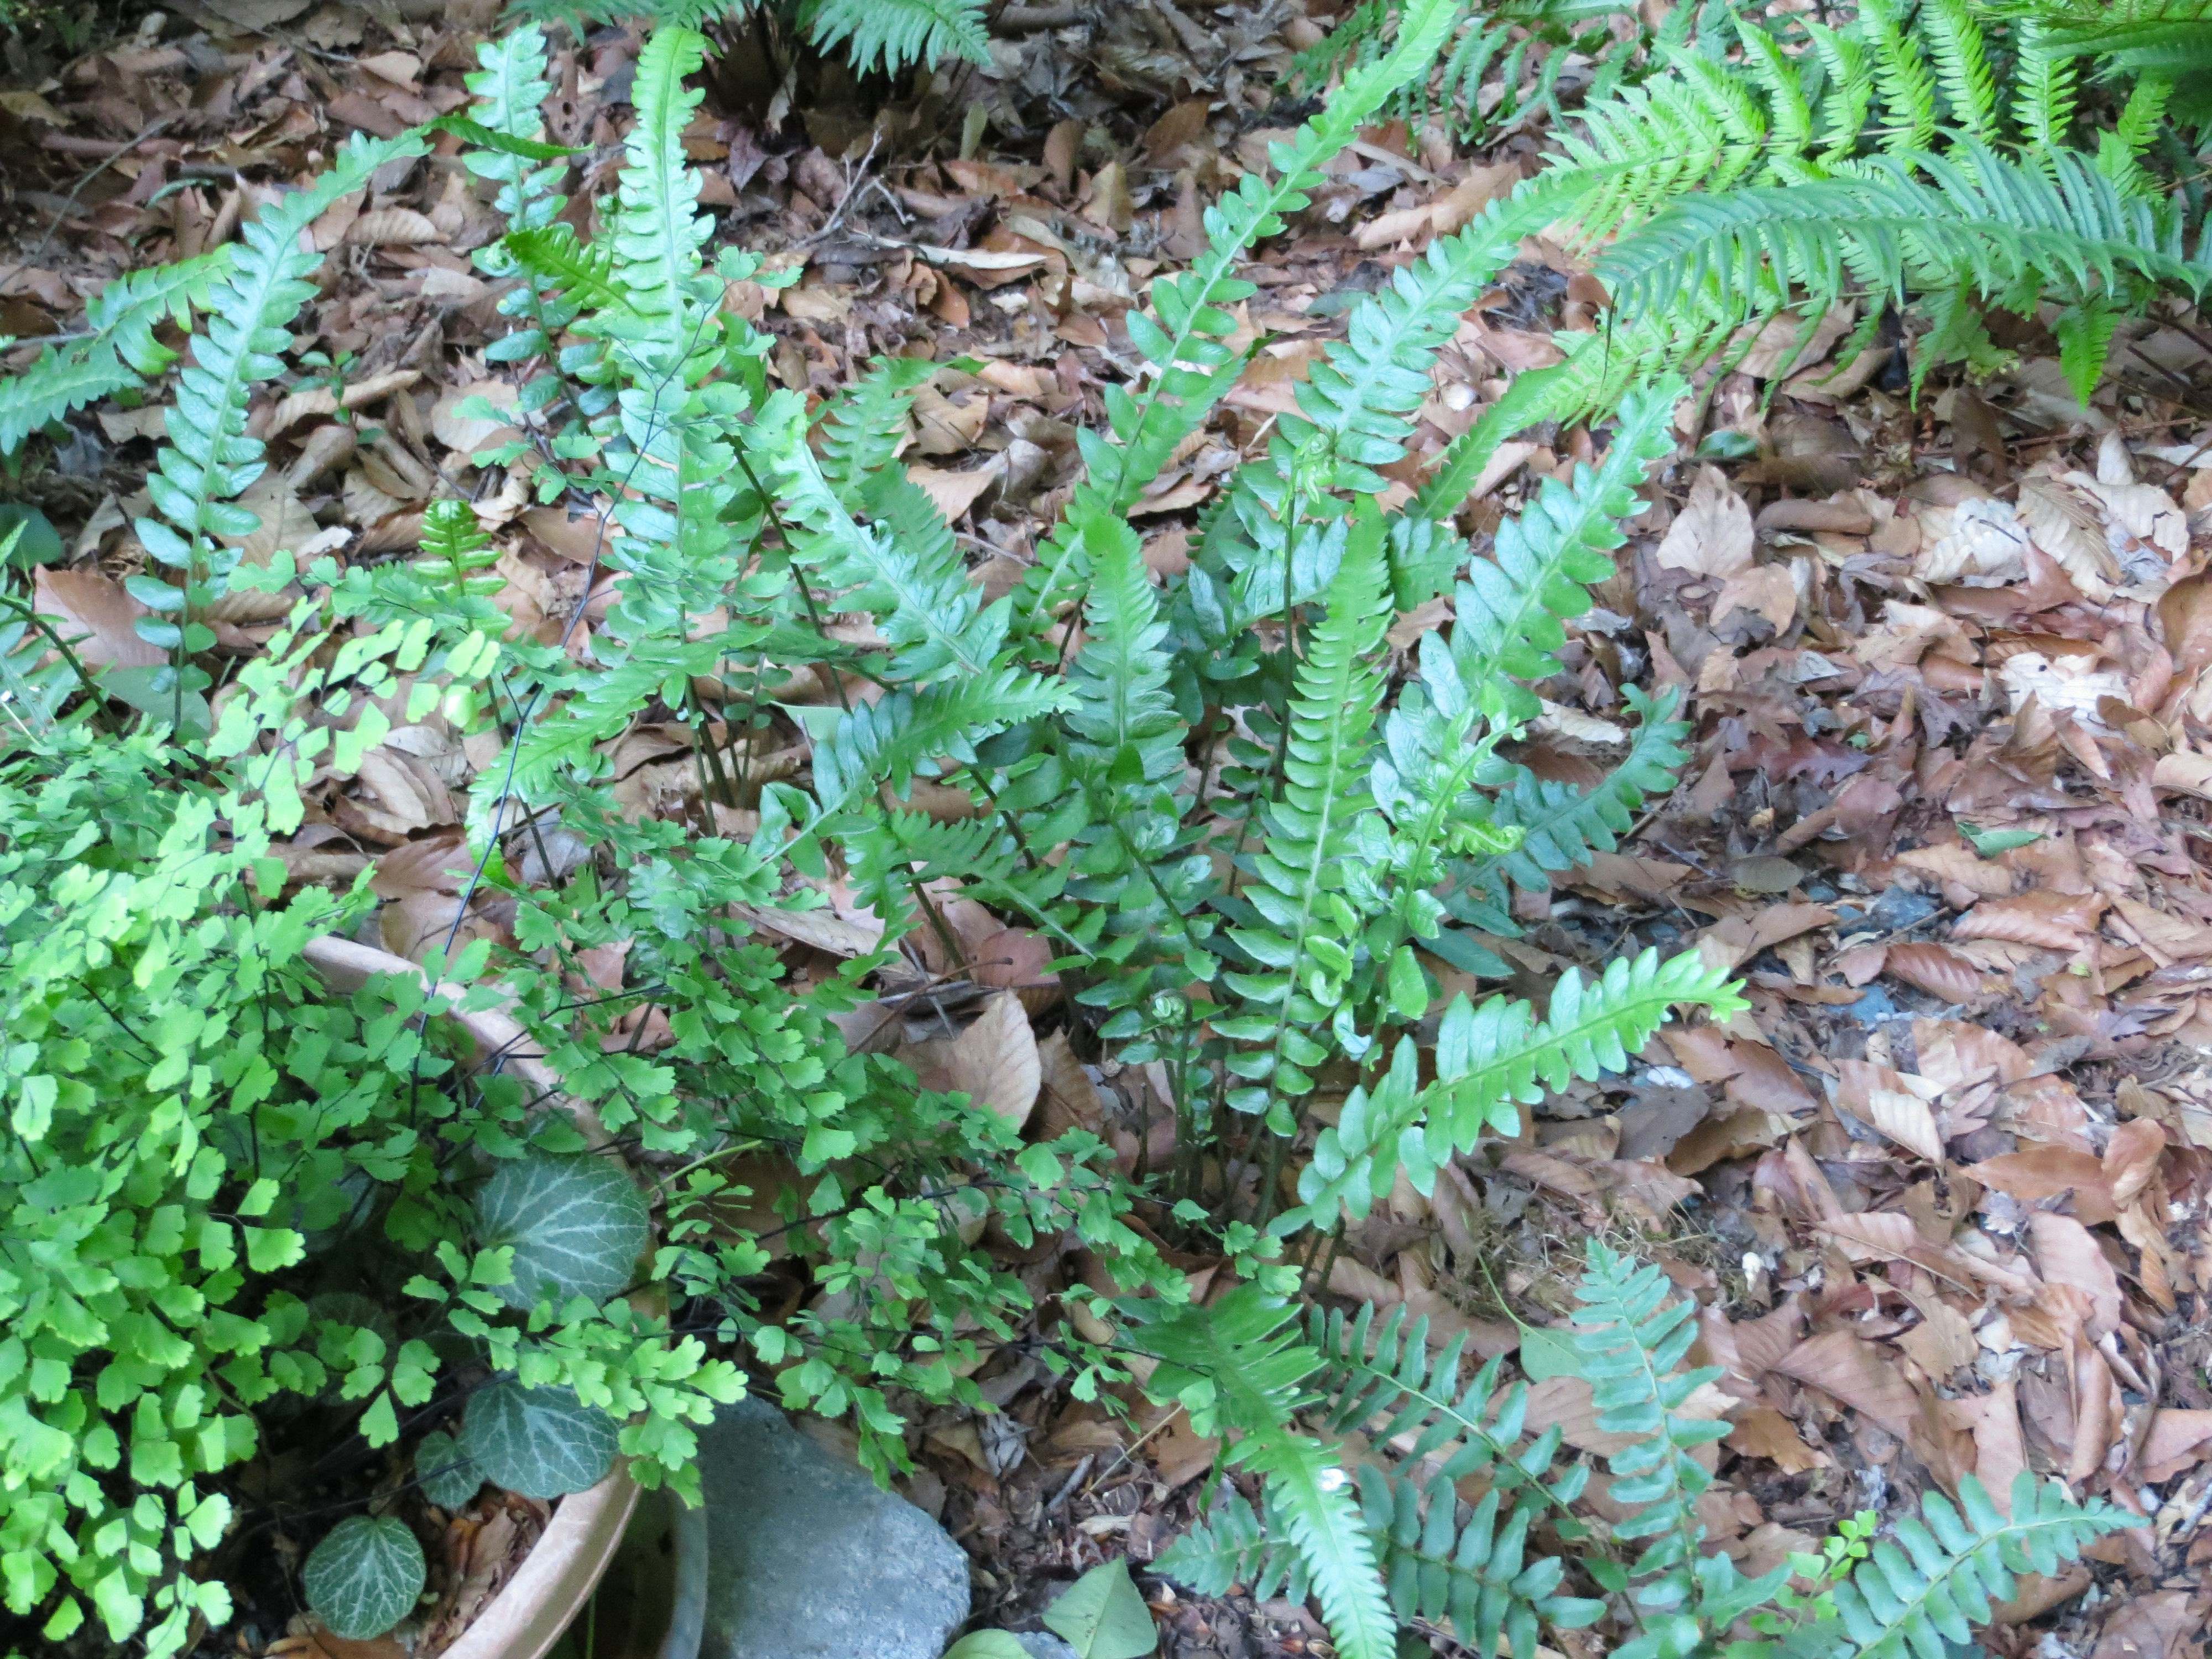
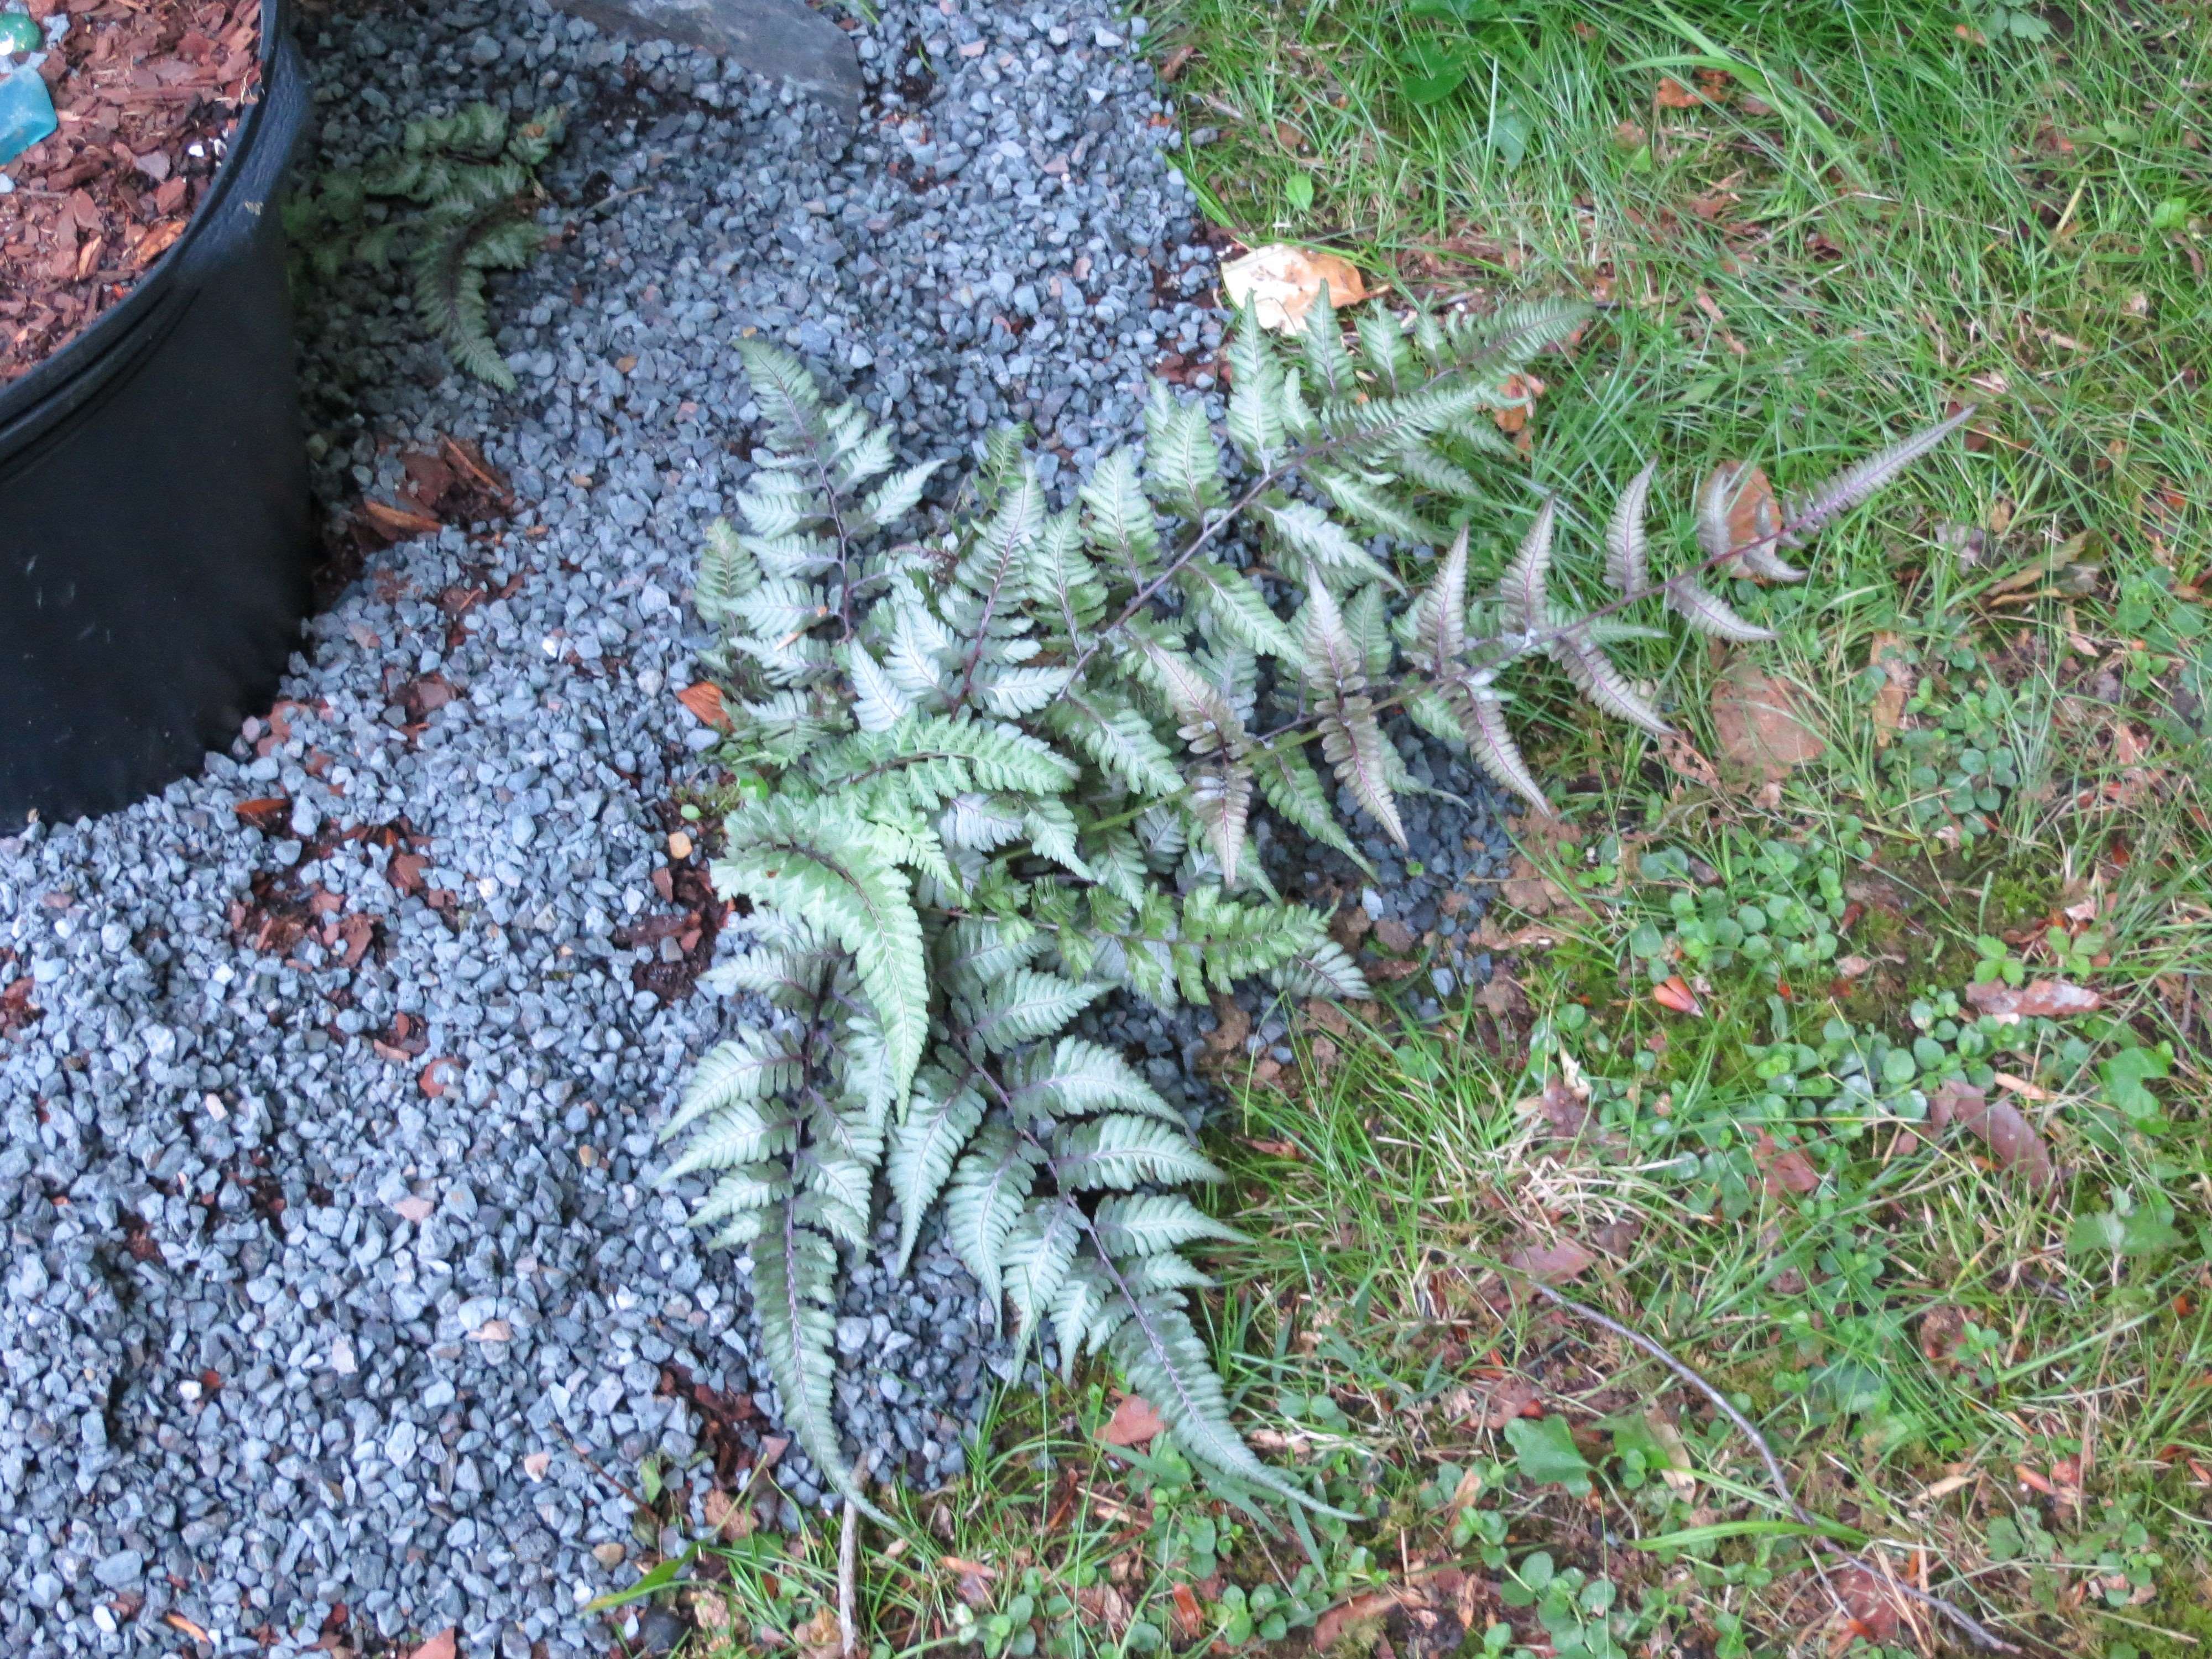
Some of the sporelings in the bonsai tray and clam-shell above are from this Deparia, the fern in the center.
With appreciation to Jim Stephens of Garden Ruminations, who
hosts Six on Saturday each week.


You are clearly doing great with “what you have”. Very interesting narrative of your processes, and wonderful photos. I never knew about what you can do with Sporelings!
LikeLiked by 1 person
Sporelings really demonstrate the magical processes of nature, and how to work with them. ❤
LikeLiked by 1 person
Fascinating!
LikeLike
Ferns from spores takes patience. I would find it frustrating to work with something that I can not see.
LikeLiked by 1 person
Faith, Tony- we garden by faith and a bit of skill. You can see the spores to sow them, but they do ‘disappear’ into the medium. I’ve tried sowing them on different things over the years. In the wild, they seem to produce the most sporelings when the spores are growing in moss. It is easier when you are dealing with a bulb or a shrub, I’ll agree with you.
LikeLiked by 1 person
I try to look at what grows well in my soil and spread the seeds around. But then I’ll spot a plant a like and try it on the spur of the moment too!
LikeLiked by 1 person
Its always fun, isn’t it? ❤ ❤ ❤
LikeLike
Iris pseudata is amazing. The oakleaf hydrangeas haven’t bloomed around here yet, but it’s a remarkable plant with truly distinctive leaves. Thanks for sharing your method for propagating ferns. I use pretty much the same thing, but sterilizing in the microwave. You’re talking about boiling water, but then the soil is very soggy?
LikeLiked by 1 person
Bonjour, Fred, yes the soil is soggy. And the plastic wrap makes a closed environment like a terrarium where there is regular ‘rain.’ The male and female gametes, produced by the prothallia, need a moist environment because the male gamete swims to a prothallium holding a female gamete to complete this first stage of their reproduction. I will sometimes add a little water a few months in if it seems that they need a little ‘help’ finding one another. If there is ever too much moisture then a few hours uncovered solves the problem. The oakleaf has become my favorite of the Hydrangeas for its wonderful leaves and long-lasting flowers.
LikeLiked by 1 person
I have never seen Iris pseudata but have grown both its parents. The Japanese water iris, Iris ensata, is a big favourite of mine.
LikeLiked by 1 person
I agree with you that I. ensata is one of the most beautiful of the Iris species. I loved them as a child when I first saw them growing around a pond, in the Japanese garden of a city park. I. pseudata are easy in this area and don’t require consistently moist soil to thrive. These I. pseudata have the elegance of both and are very adaptable to a variety of growing conditions. More nurseries are carrying them now, and they are available at Plantdelights.com. The grower I ordered from, who was producing new cultivars, appears to no longer be in the retail nursery business.
LikeLiked by 1 person
The Iris looks amazing! Spring is here and you are ready! Thanks for sharing!
LikeLiked by 1 person
❤ ❤ ❤
LikeLiked by 1 person
Foliage can add such beauty to ghe garden. The deer must be a real menance. We have our challenges but I am relieved deer aren’t one of them. LOVE the iris .
LikeLiked by 1 person
Great planting and care tips. I have more problems with rabbits than deer here, but both have caused extensive damage in my garden. Many plants are caged, and I’ve added numerous Alliums, which they don’t touch. I love a post like this, where you share several views of each plant with lots of background information.
LikeLiked by 1 person
Thank you so much. Our rabbits haven’t shown up yet this year, and we are concerned. We normally have 3 or 4 grazing the lawn every evening by now. They do nibble things I would rather they leave alone sometimes, but we still miss them and worry about what happened to them. Alliums and any herb are safe here, too, but don’t necessarily protect tasty plants growing nearby. ❤ ❤ ❤
LikeLike